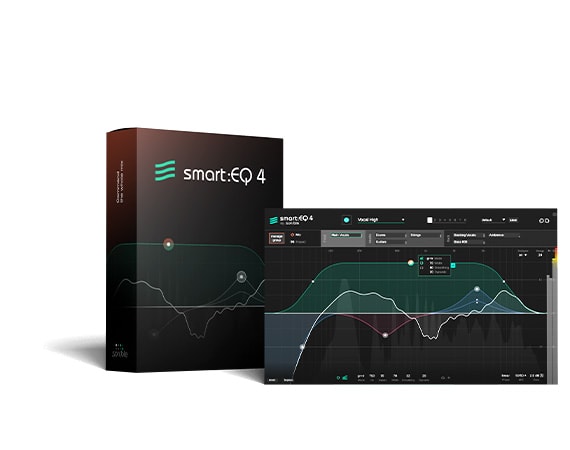
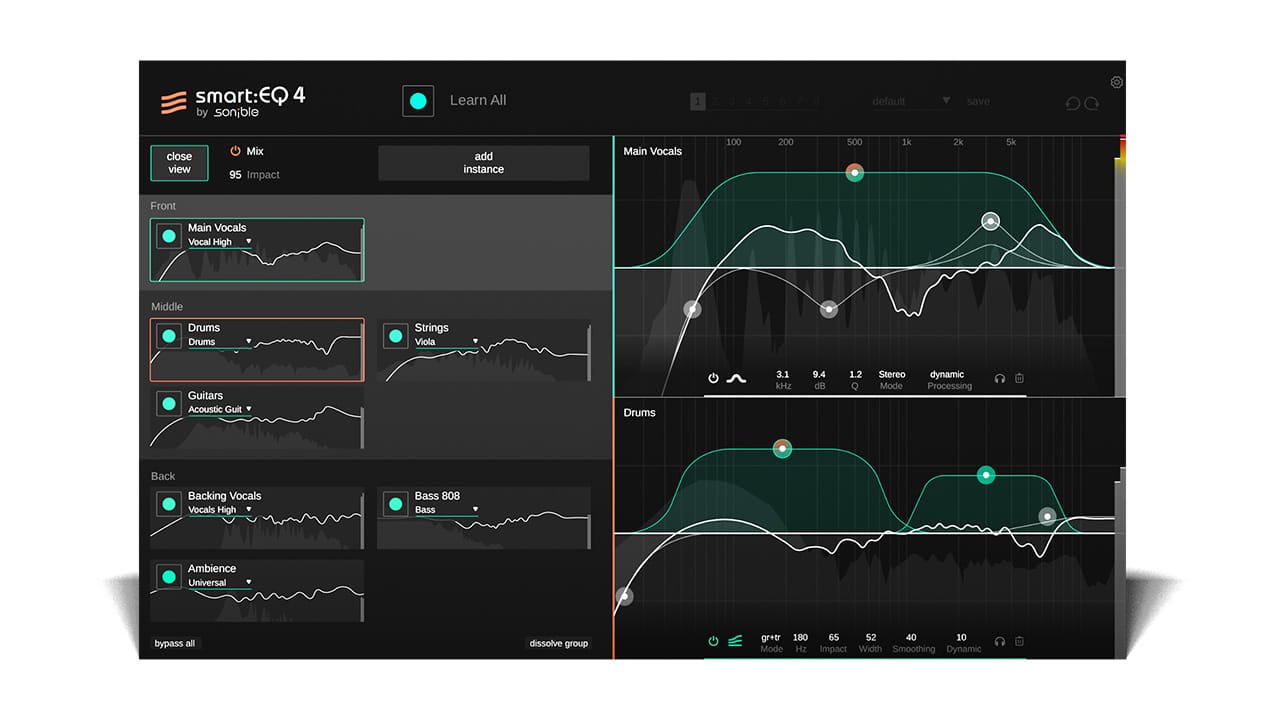
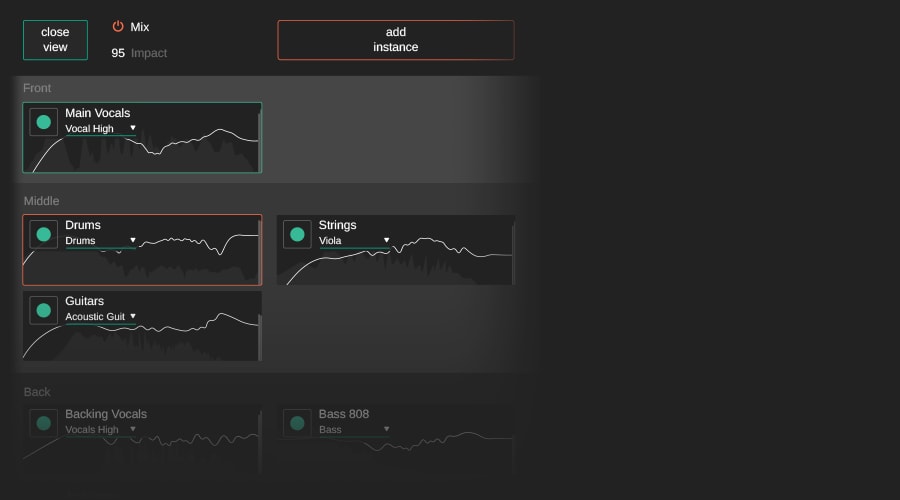
smart:EQ 4 uses AI to correct spectral issues and achieve tonal balance. This equalizer empowers you to approach a project from a mix’ perspective: Intelligent cross-channel processing offers hierarchical control over multiple tracks and enables you to get spectral mixing done via drag and drop.

Unlike usual equalizers that leave the context of a mix out of any processing, smart:EQ 4 lets you take control over multi-track unmasking processes easily and get spectral mixing done by simple dragging and dropping up to 10 tracks. This set priorities for each smart:filter, bringing some elements to the forefront of the sonic stage, leaving some in the middle, and pushing some into the background. Switching back and forth between instances is a thing of the past in this innovative tool – any instance within the same group can be remotely controlled from any other instance.
The traditional way to mix a project, starting with individual elements and building a mix piece-by-piece, is the bottom-up method for mixing music. This tried-and-tested approach is still possible in smart:EQ 4, with simple control over the character of each channel of a mix thanks to the plug-in’s spectral shaping.
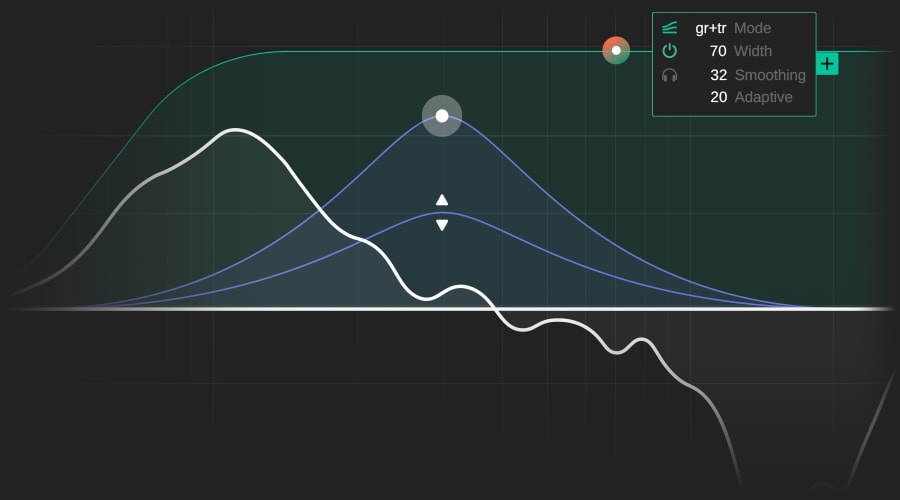
The centerpiece of smart:EQ 4 is the smart:filter – it automatically balances the signal based on a target Profile you choose for your tracks. The smart:filter within each EQ instance comes with a range of features to adjust the AI-powered processing to your liking. Open up the smart:filter widget to tweak the Smoothing parameter for gentler filtering and turn up the Adaptive option to smooth out highly dynamic signals. You can split the green weighting curve of the smart:filter and set a certain frequency range to define where the intelligent algorithms should get to work.
smart:EQ 4’s smart:filter can be used in three modes: 'Track' balances the channel; 'Group' doesn’t affect the channel but reduces masking between it and other group members; 'Track and Group' applies balancing to the channel and makes it subject to unmasking.
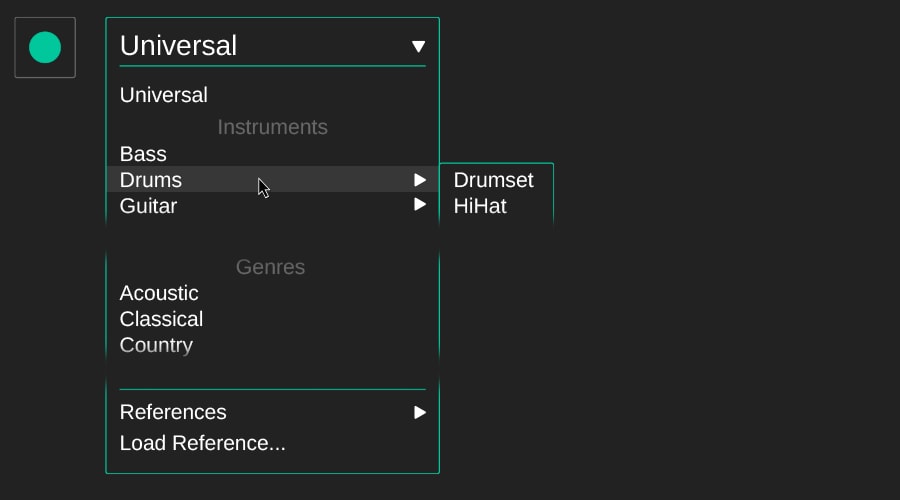
With each generation of smart:EQ, the range of available Profiles grew. smart:EQ 4 sports instrument and vocal Profiles that you can use on single tracks or busses. To give your mix a final spectral polish, use one of the genre-based profiles. If you are chasing a certain sound, load up a reference track to create a custom profile and have smart:EQ 4 emulate its spectral character and balance on your channel or buss. By popular demand, now you can even specify the maximum learning time that smart:EQ 4 should use to analyze the input signal.
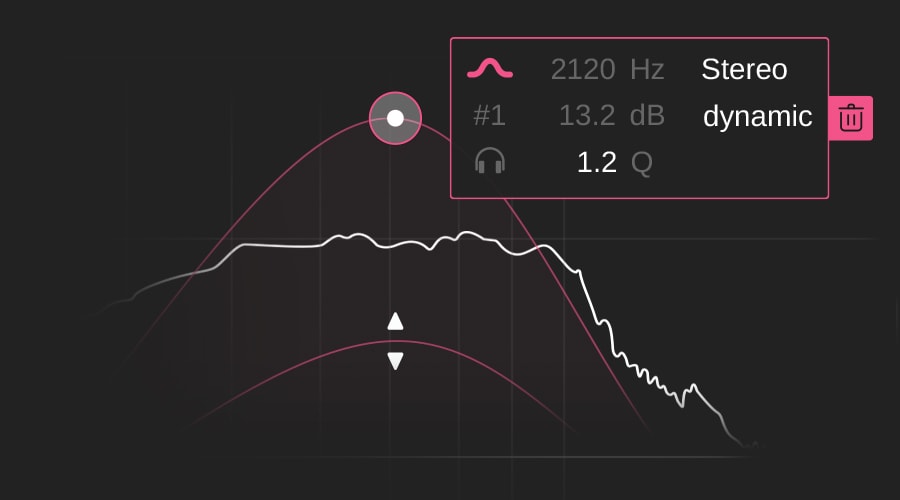
smart:EQ 4 is a highly versatile EQ that has got you covered with every feature you would expect from a pro-grade equalizer. In addition to the smart:filter, smart:EQ 4’s standard EQ bands sport dynamic behavior, offering a Dynamic Filter Widget with familiar compressor-like controls. These Standard EQ bands can be used alongside or instead of the main smart:filter bands for any instance of smart:EQ 4. There is also an Auto Gain Feature to compensate for level changes, comprehensive Mid-Side processing and an analyzer feature that not only shows you the track at hand but all instances that are in the same group.
* We offer a 40% EDU discount for students and lecturers. Apply now!