Level up your production by mastering this dynamics processing technique in three important contexts.
Mid/side compression is a powerful tool that producers can use to gain tight control over the stereo image of their tracks.
Using mid/side compression opens up a world of both creative and technical possibilities which would not be possible with traditional compression.
In this article we’ll be taking you through some of our favorite applications for mid/side compression to help you level up your music production. Our own AI-powered compressor smart:comp 2 has powerful mid/side integration, making it a great go-to.
If you want to follow along with the techniques discussed in this article you can try smart:comp 2 for free with our 30 day trial.
To learn more about mid/side processing make sure to read our article on the Top 3 Applications of Mid/Side EQ too.
Perhaps the most common use case for a mid/side compressor is in a mastering chain to enhance the stereo width of a track. Most mastering engineers will employ a mid/side compressor in their workflow, and you can use one yourself for home masters, or to increase the stereo image of a sub mix or individual elements in your track.
To demonstrate this we will be working on this electro-style track.
As you can hear, there’s plenty of stuff going on in the side channels of this mix. The cowbells, hi-hats and shakers are all moving around the stereo field. The bass and kick elements also have stereo information in the mids and upper frequencies.
We can help bring the side elements out – and in the process make the whole mix sound fuller – with a mid/side compressor like smart:comp 2.
First, load smart:comp 2 on the master channel and set it to mid/side mode using the button in the top left of the UI. We only want to adjust the side channel so click the S below the ratio bar to select the side channel compressor.
What we are trying to achieve is a slight bit of compression in the sides to balance the dynamics and make them a little more present.
We’ll set a medium attack and release of around 15 ms and 133 ms respectively. Set the ratio to 2:1 and adjust the threshold to get between 1 and 4 dB of gain reduction depending on the style of track you are working on. Because this is an electronic track we can push the gain reduction a bit for a more extreme effect.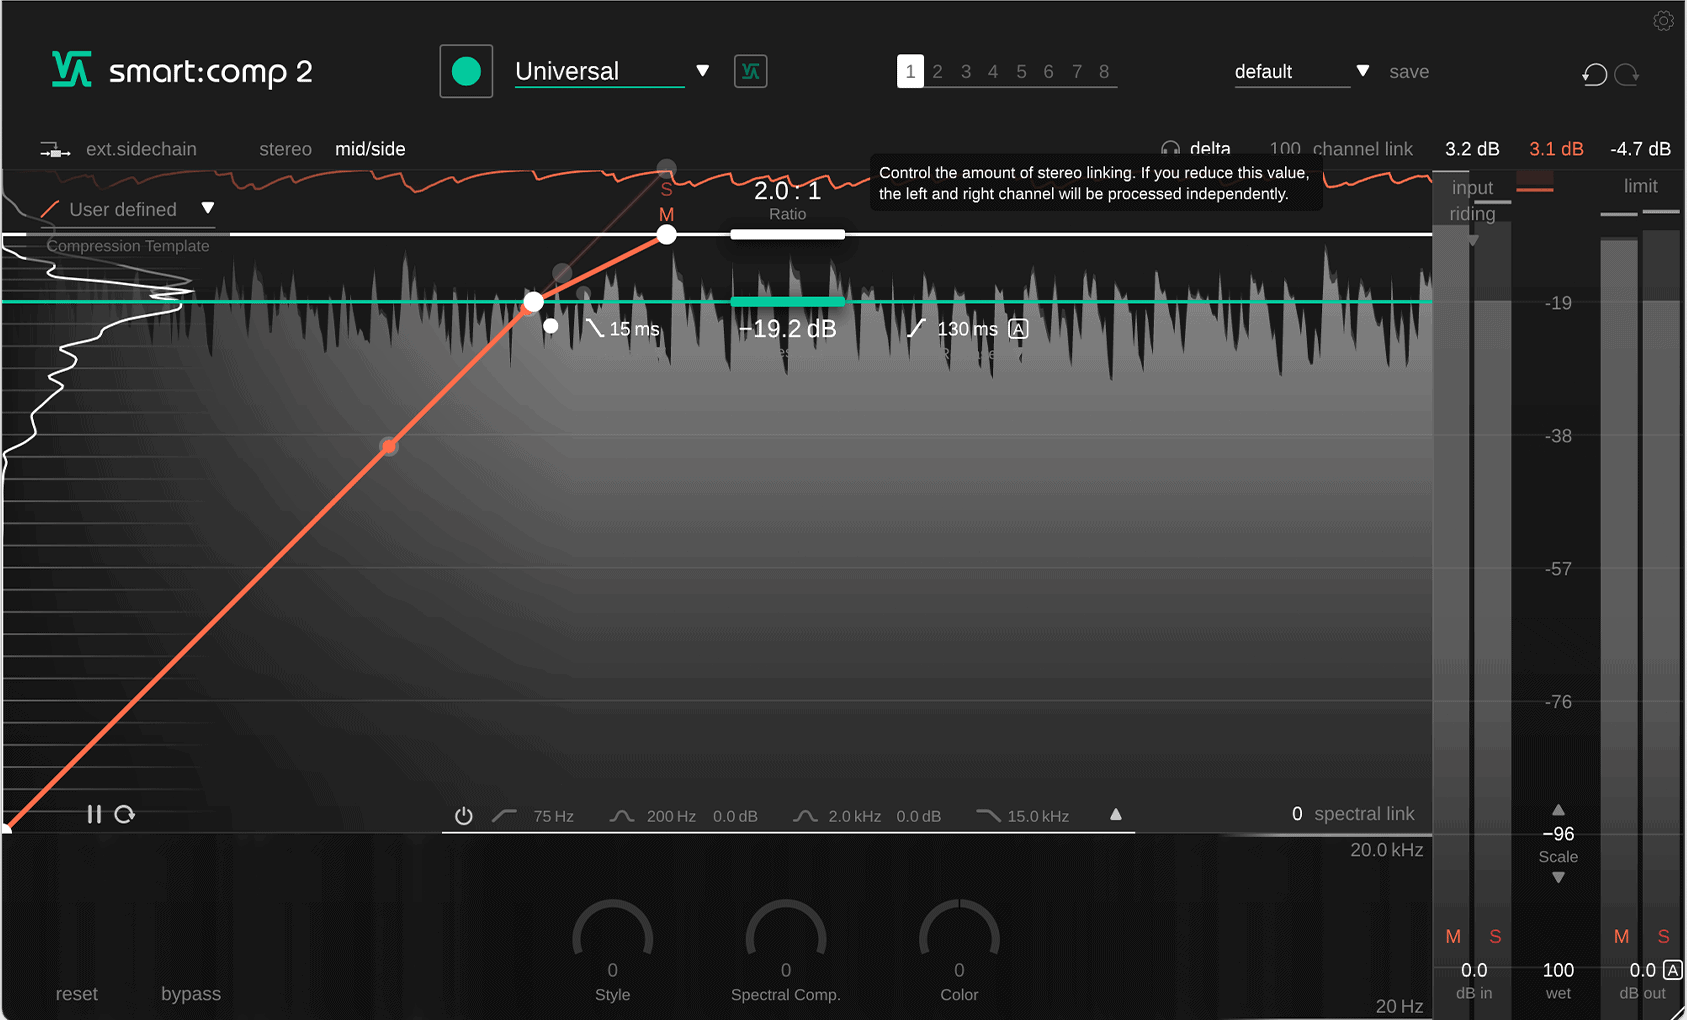 Finally, activate auto gain makeup to ensure we don’t lose any volume. Here’s what we have now.
The effect is quite subtle, but if you compare this audio to the original audio you will notice that the sides – particularly the sides of the bass part – are much more present. They sound louder and in general the mix sounds fuller.
Sidechain compression is one of the most common mixing techniques used in all genres of music to help balance the bassline and kick drum in a track.
It’s likely that you’ve already been using this technique for years and you don’t think there’s much more to learn about it, however, by using mid/side compression we can step up our sidechain game to another level.
For this technique you will need a mid/side-enabled compressor that also has external sidechain functionality. Fortunately, smart:comp 2 has both of these and it’s available with a 30-day free trial.
Today we’ll be demonstrating this technique on this rock loop which features a bass guitar and drum beat.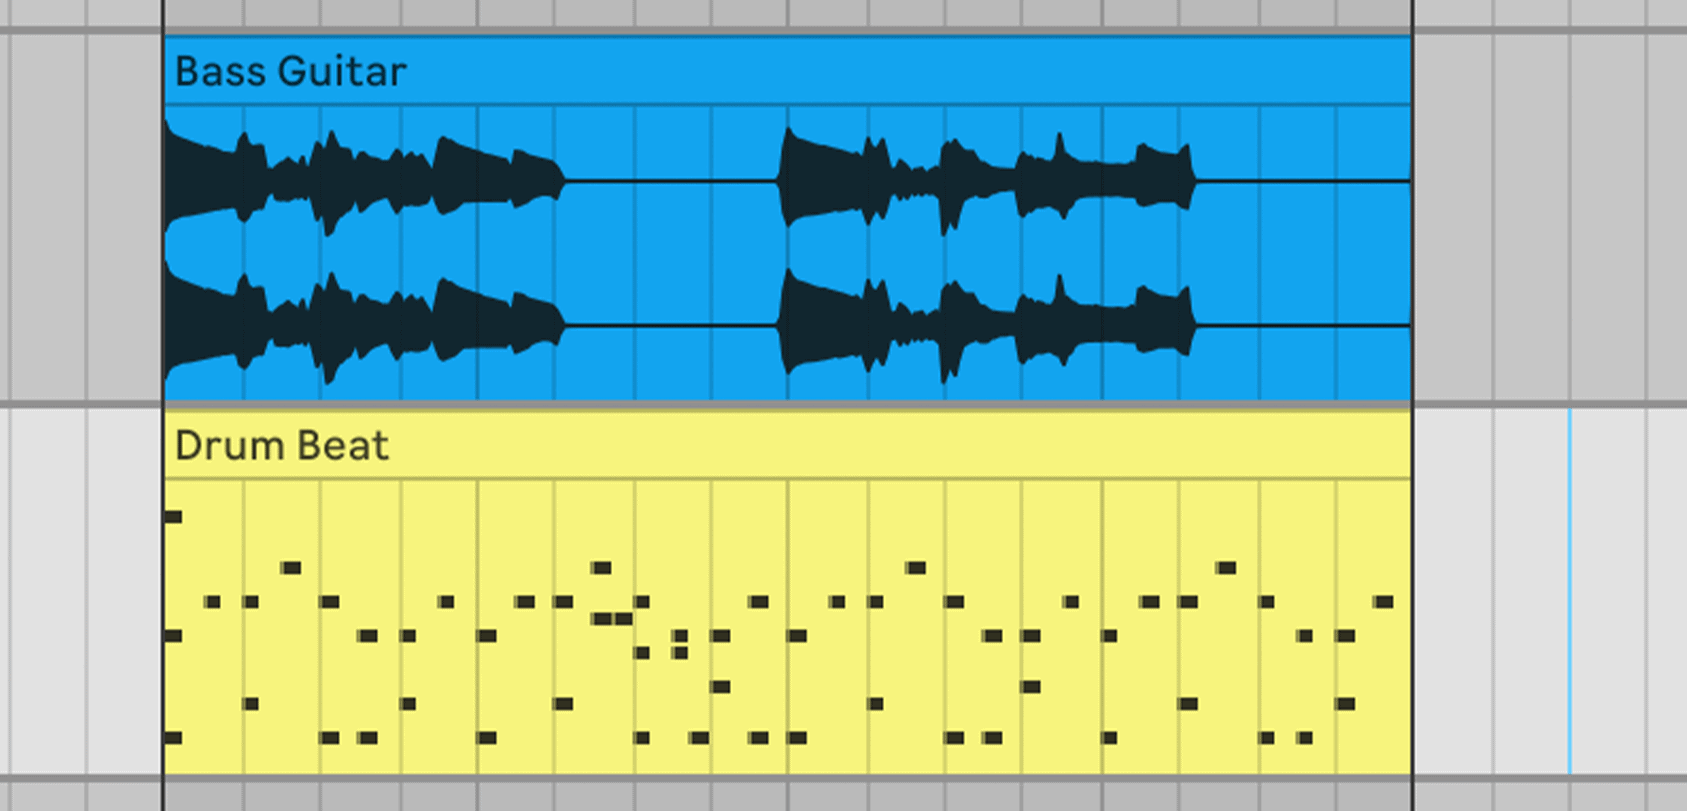
The drum beat is on a MIDI channel which means we can directly route the kick drum to be the sidechain trigger of smart:comp 2.
To do this in Ableton, load smart:comp 2 on the bass channel, in the small plugin UI in the channel strip select the kick as the sidechain input using the drop down menus.
 Each DAW handles sidechain routing differently, if you aren’t sure how to perform this step in your DAW of choice then be sure to check the developer’s website for more information.
With the kick set as the sidechain input, we can now start programming smart:comp 2.
Set the compressor to mid/side mode. When smart:comp 2 first enters mid/side mode by default you are automatically editing the mid channel.
Now, activate external sidechain. When we play the loop, the visual read out in smart:comp 2 will show the kick signal in blue as opposed to the bass signal in red indicating that the compressor is being triggered by the kick.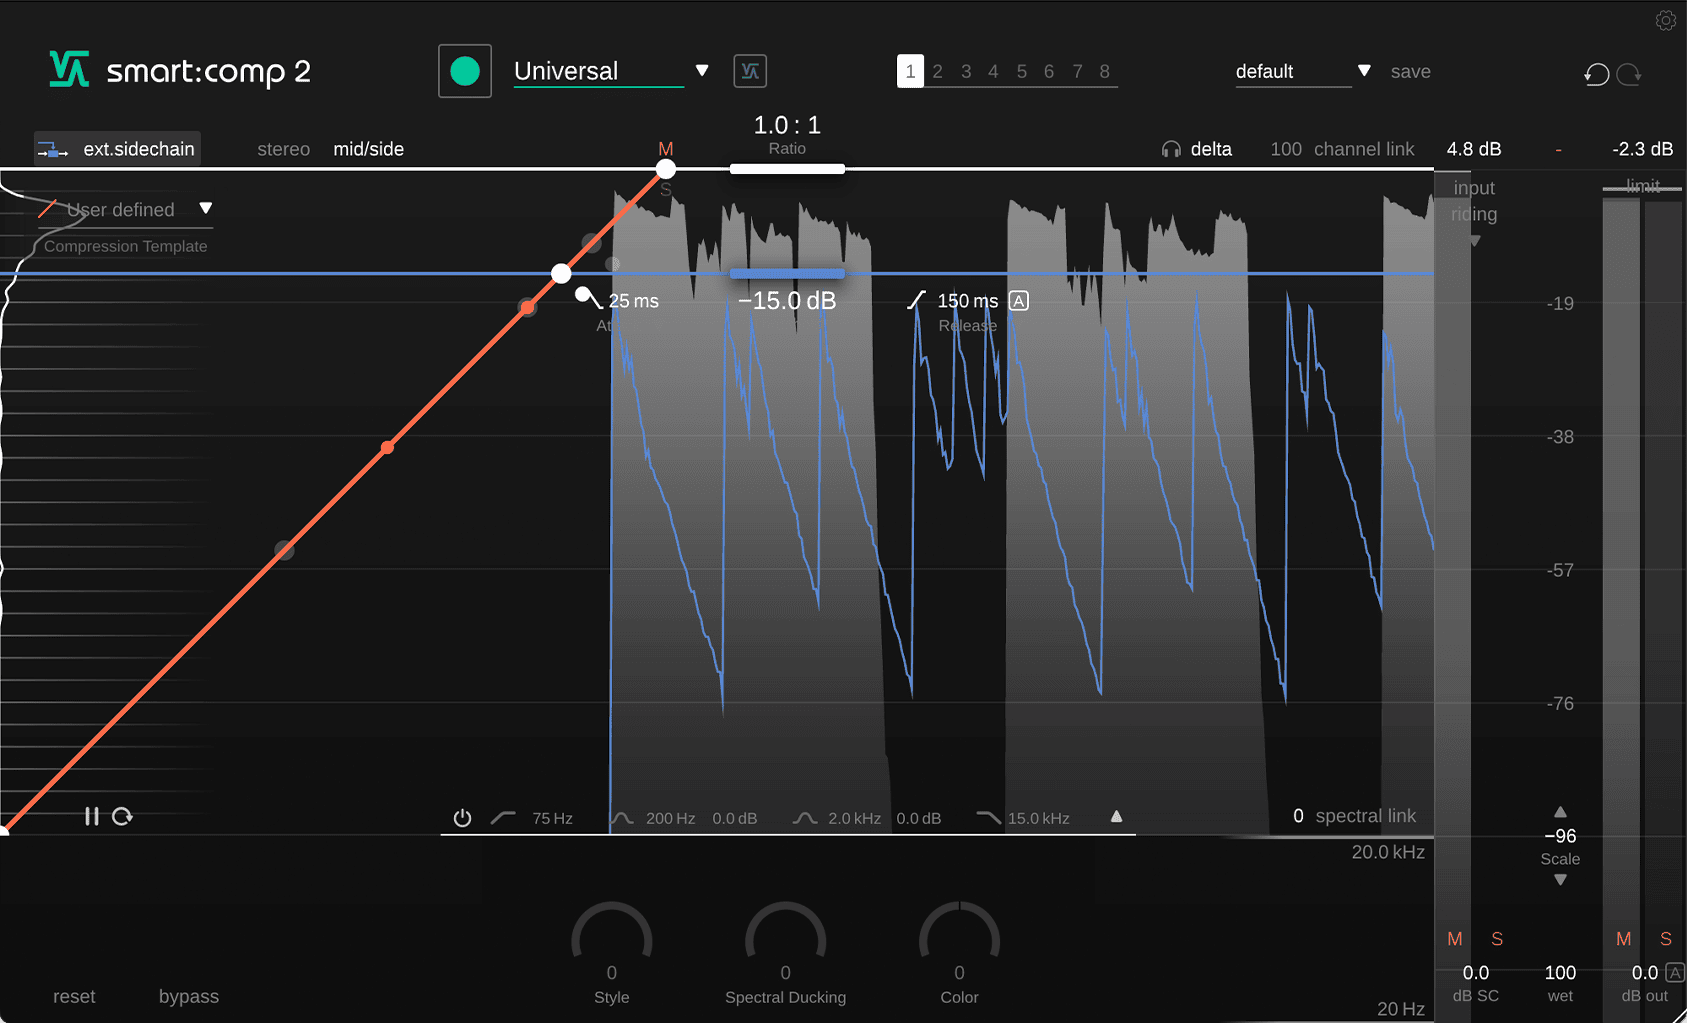 We can now set the parameters on smart:comp 2 so that the bass guitar ducks out of the way of the kick every time it hits. This stops the two parts clashing which can happen as they share a lot of the same bass frequency information. When two instruments contain information in the same frequency range spectral masking can occur – making both instruments less clear in the mix.
By ducking the bass out of the way of the kick, the kick drum can punch through clearly, but when it isn’t playing the bass can be loud and at the front of the mix.
When setting the mid channel compressor make sure to have a quick attack and release. We don’t want to suck all of the power out of the bassline by letting the compressor release for too long. On the other end of the spectrum, if the attack is too slow then the kick won’t punch through.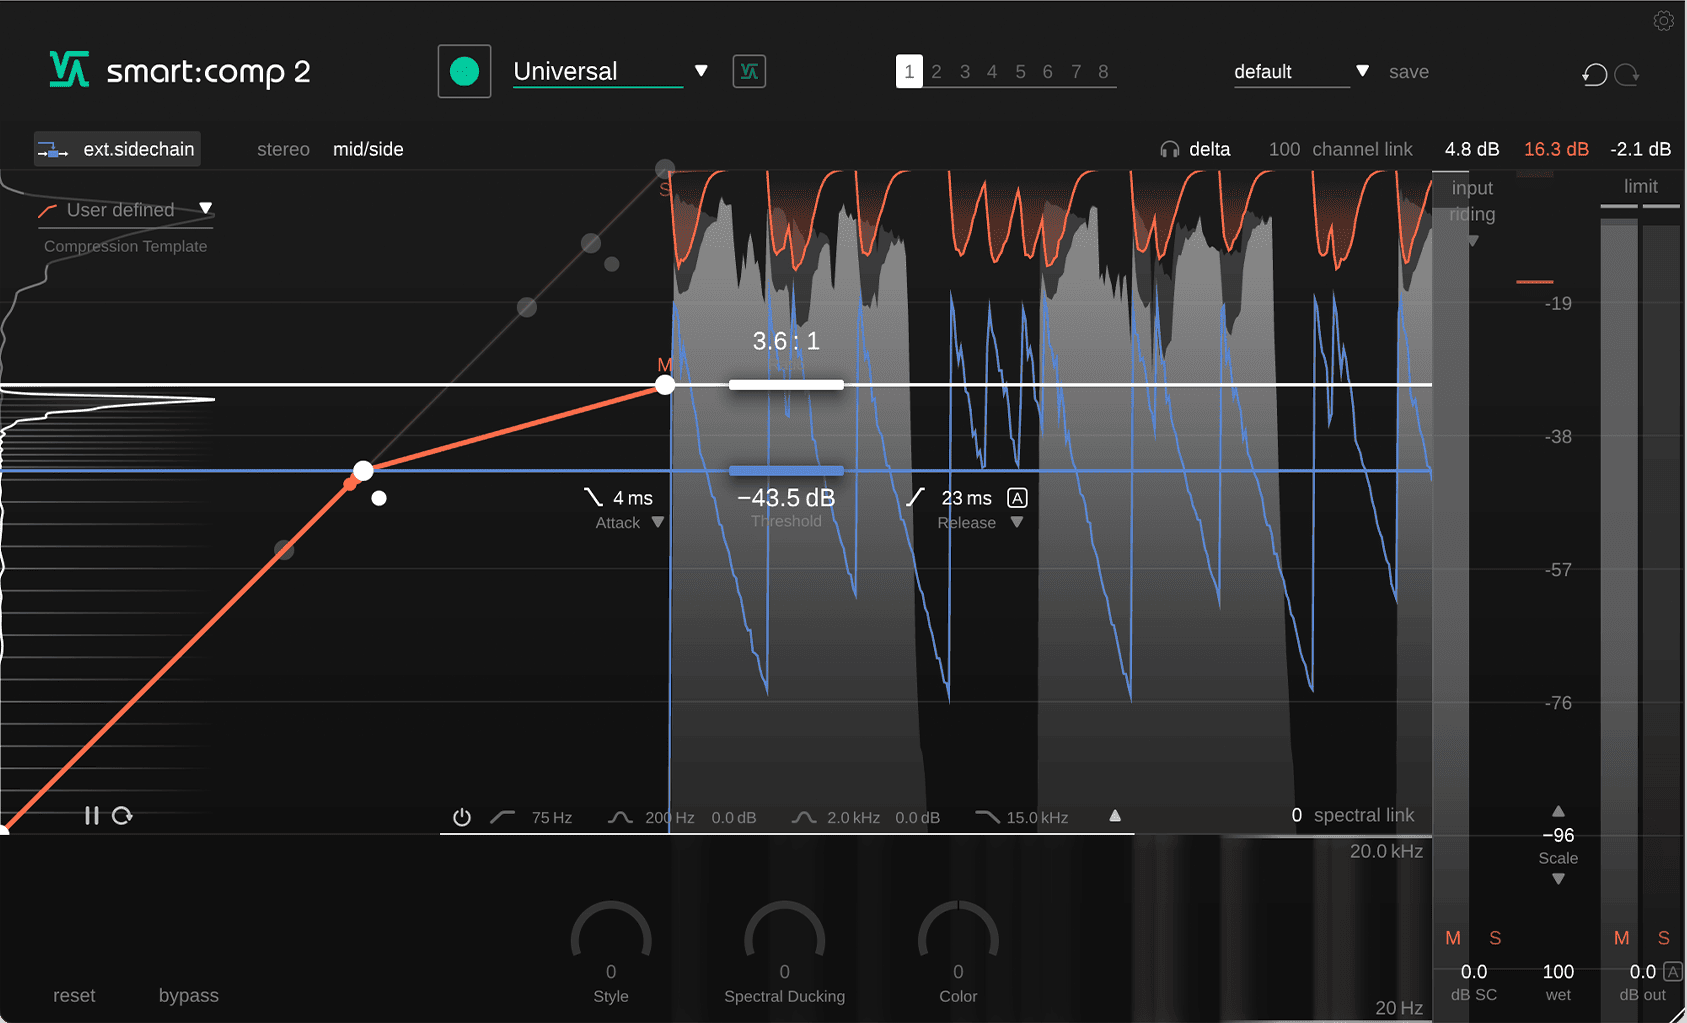 The reason we only want to duck the mid channel when the kick hits, is that this is where most of the impactful information in the kick is contained, therefore this is where most of the spectral masking will occur.
Here’s how the loop sounds now with the mid channel of the bass ducking out of the way of the kick.
You will notice that the kick is very present in the middle of the stereo field now. It feels much weightier but the bassline is still audible in the sides.
Working with drum loops undeniably gives you as a producer less control over your drum beats. However, sometimes you listen to a loop and the groove just works and no matter what you do to try and recreate that groove, sometimes it’s just not possible to match the exact energy and feel of a strong drum sample.
At times like these there is no shame in using that loop, and luckily with the help of mid/side compression we can take a bit more control over the loop and make it our own.
For example, here we have a really nice house drum sample. The beat has the kick and snare right down the middle, and some assorted percs in the sides of the sample. We can use mid/side compression here to retain the thumping kick and snare whilst reducing the percs in the sides, giving us the option to replace them.
We’ll load smart:comp 2 on the drum loop channel, put it in mid/side mode and select the side channel to work on. The idea of this technique is to heavily compress the sides of the drum loop whilst leaving the mids uncompressed. By doing this we can reduce the volume of the sides whilst leaving the mids loud and clear.
In the case of this drum loop – and most drum loops for that matter – the sides are where the percs are located whereas the mids are where the kick and snare are. That means by doing this we are reducing the volume of the percs.
First, we’ll set the threshold of the side compressor in smart:comp 2 so that all transients are triggering the compressor as soon as they occur. In this case that means setting the threshold to -31dB.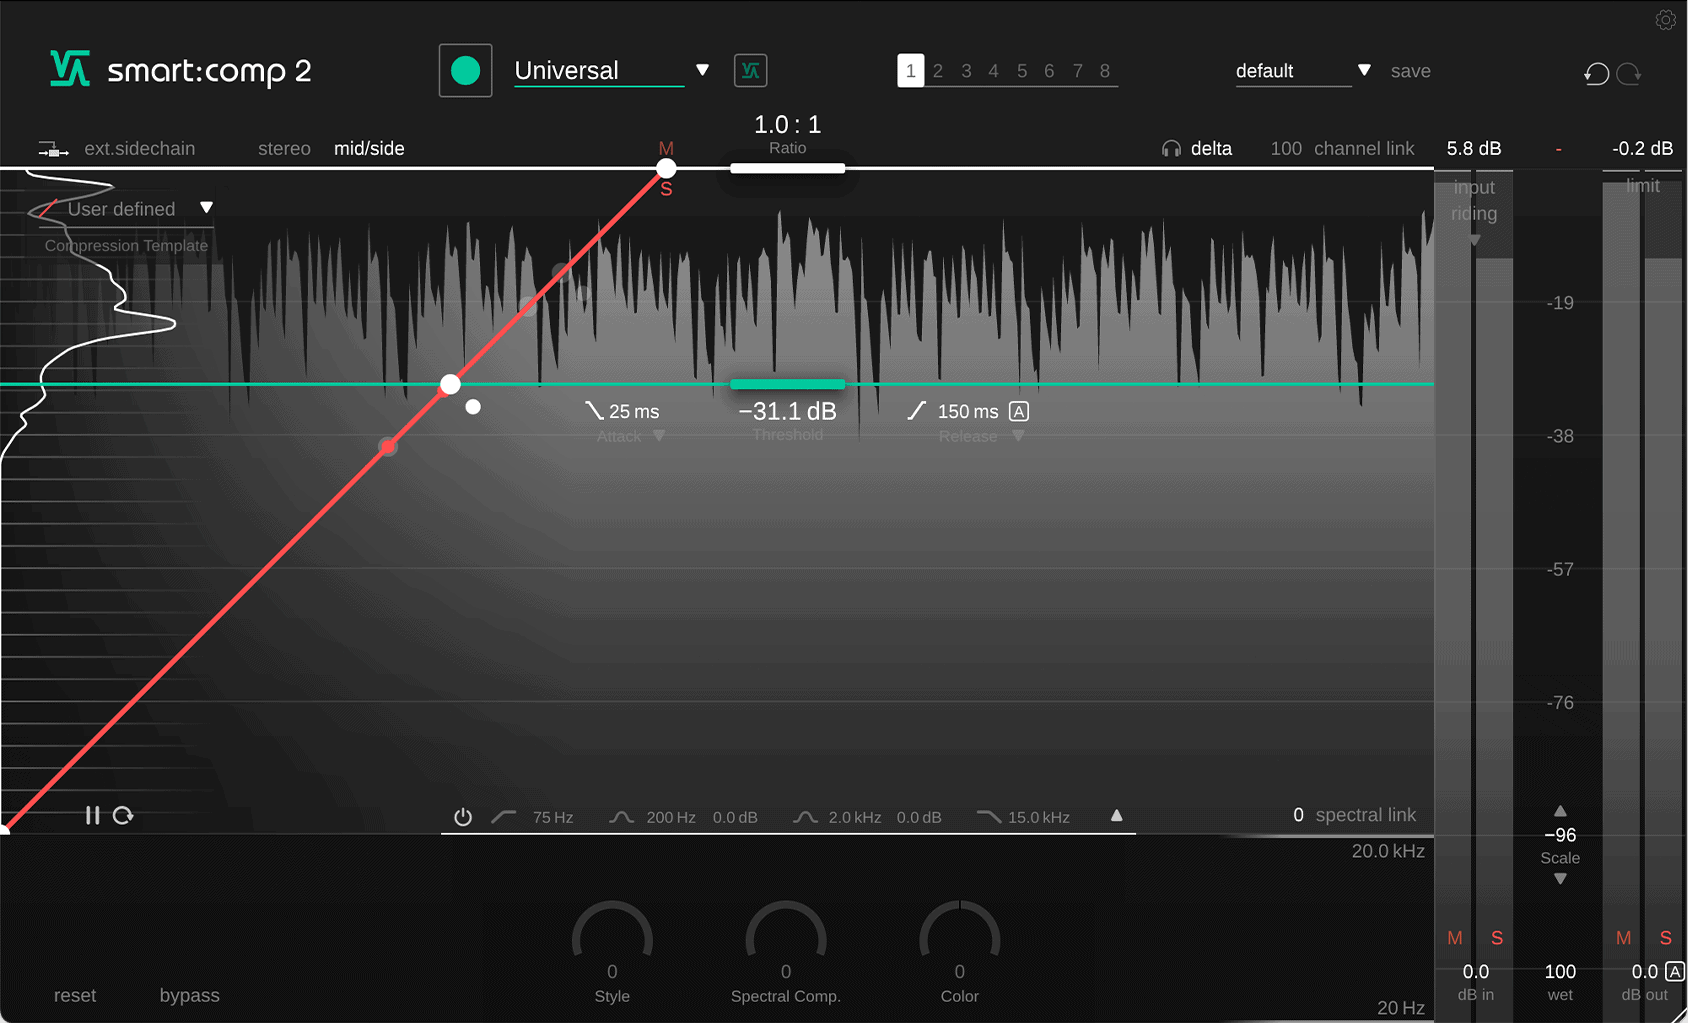 At the moment the ratio is set to 1:1 so no compression is occurring, therefore we won’t be able to hear any difference. So, let’s increase the ratio.
smart:comp 2’s highest ratio setting is 10:1. Because we want to remove as much as possible of the percs we will set the ratio to 10:1. If you are using a different mid/side compressor, set the ratio to whatever the highest setting is.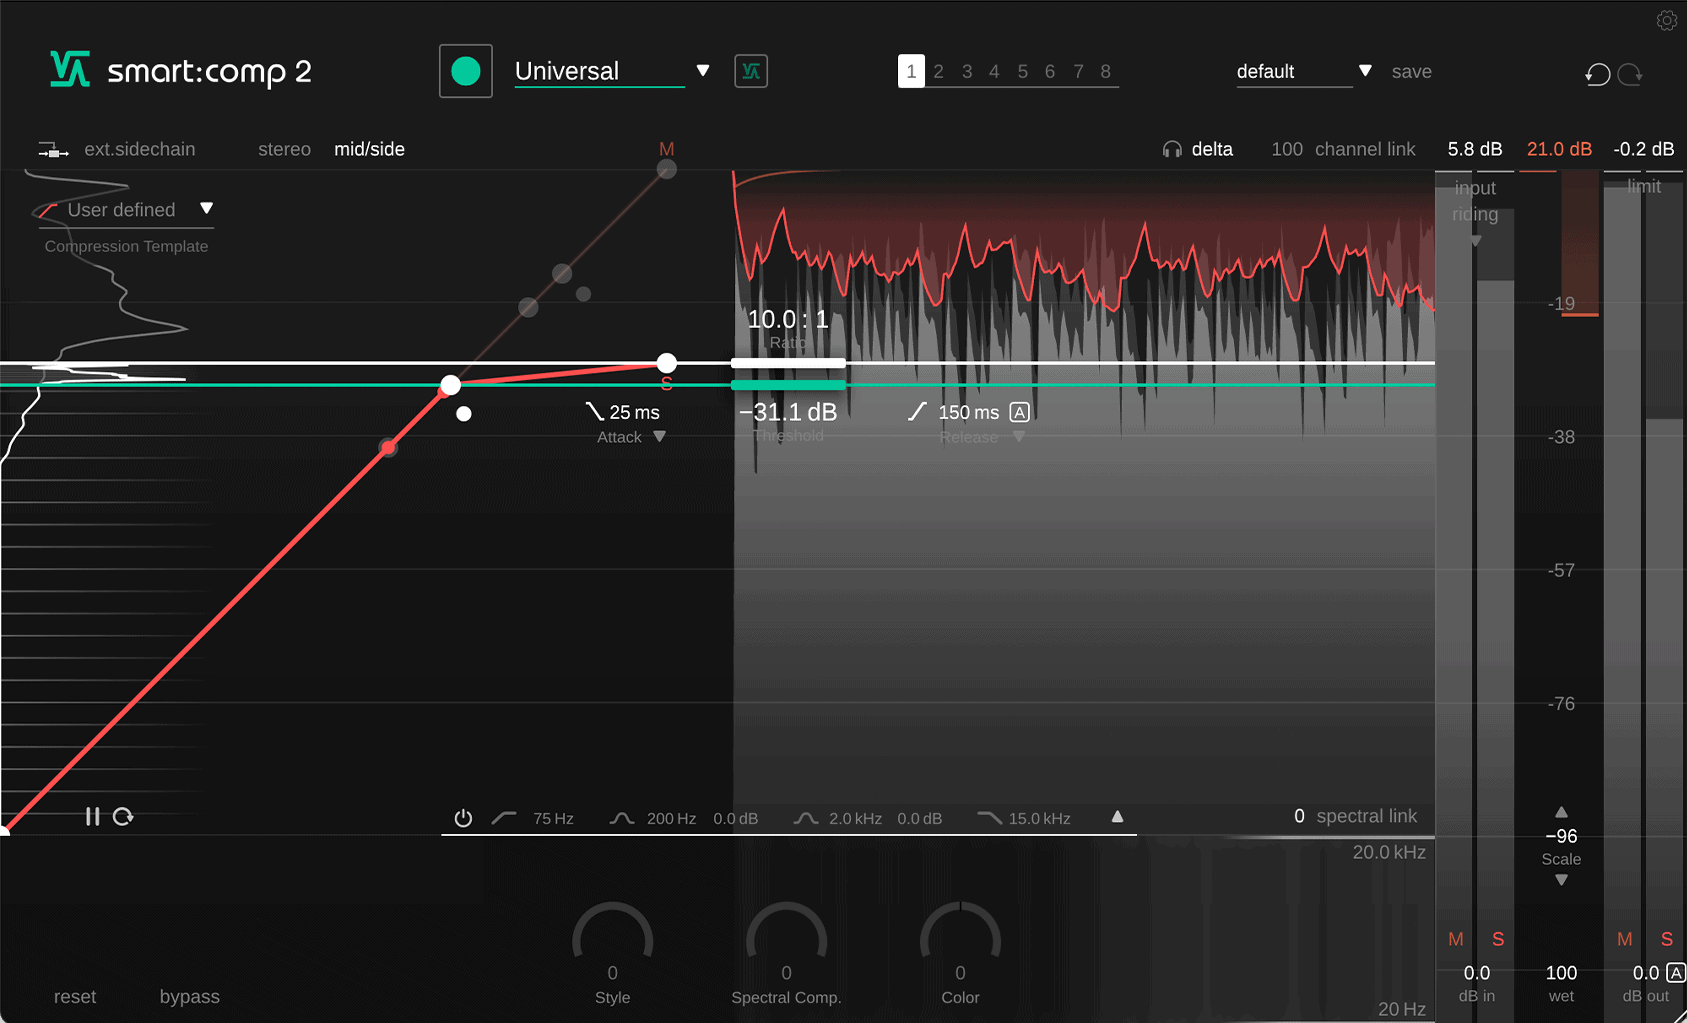 Now, if we listen to the drum loop you will hear that the percs are much less prominent. Granted, they are still audible but they take up much less room in the loop, giving us space to add more of our own elements and to make this loop our own.
To try the techniques discussed in this article for yourself, you can try smart:comp 2 free for 30 day.
For more on mid/side processing, don’t forget to read our guide to the Top 3 Applications of Mid/Side EQ.