Room modes distort the acoustics of both your control room and your recording room, especially in the low frequency range. Bass can boom in one place and be barely audible in another. Standing waves are the source of room modes. In this article we will show you how to deal with room modes in your everyday audio production environment.
Room modes – also known as room resonances – occur when certain wavelengths of specific audio frequencies correlate to the fundamental resonances of a room. These frequencies can boom and produce longer release times. At certain positions within the room they are either much louder or quieter than they are supposed to be. The fundamental resonances are determined by its dimensions.
Responsible for these acoustic effects are standing waves. They are generated principally between parallel surfaces. As their name suggests, they are stationary and always the same within a given room. The main contributing factor to standing waves is the geometry of the room itself – something that can basically only be changed through major architectural and structural changes. We show you how to deal with them without having to tear down and rebuild walls.
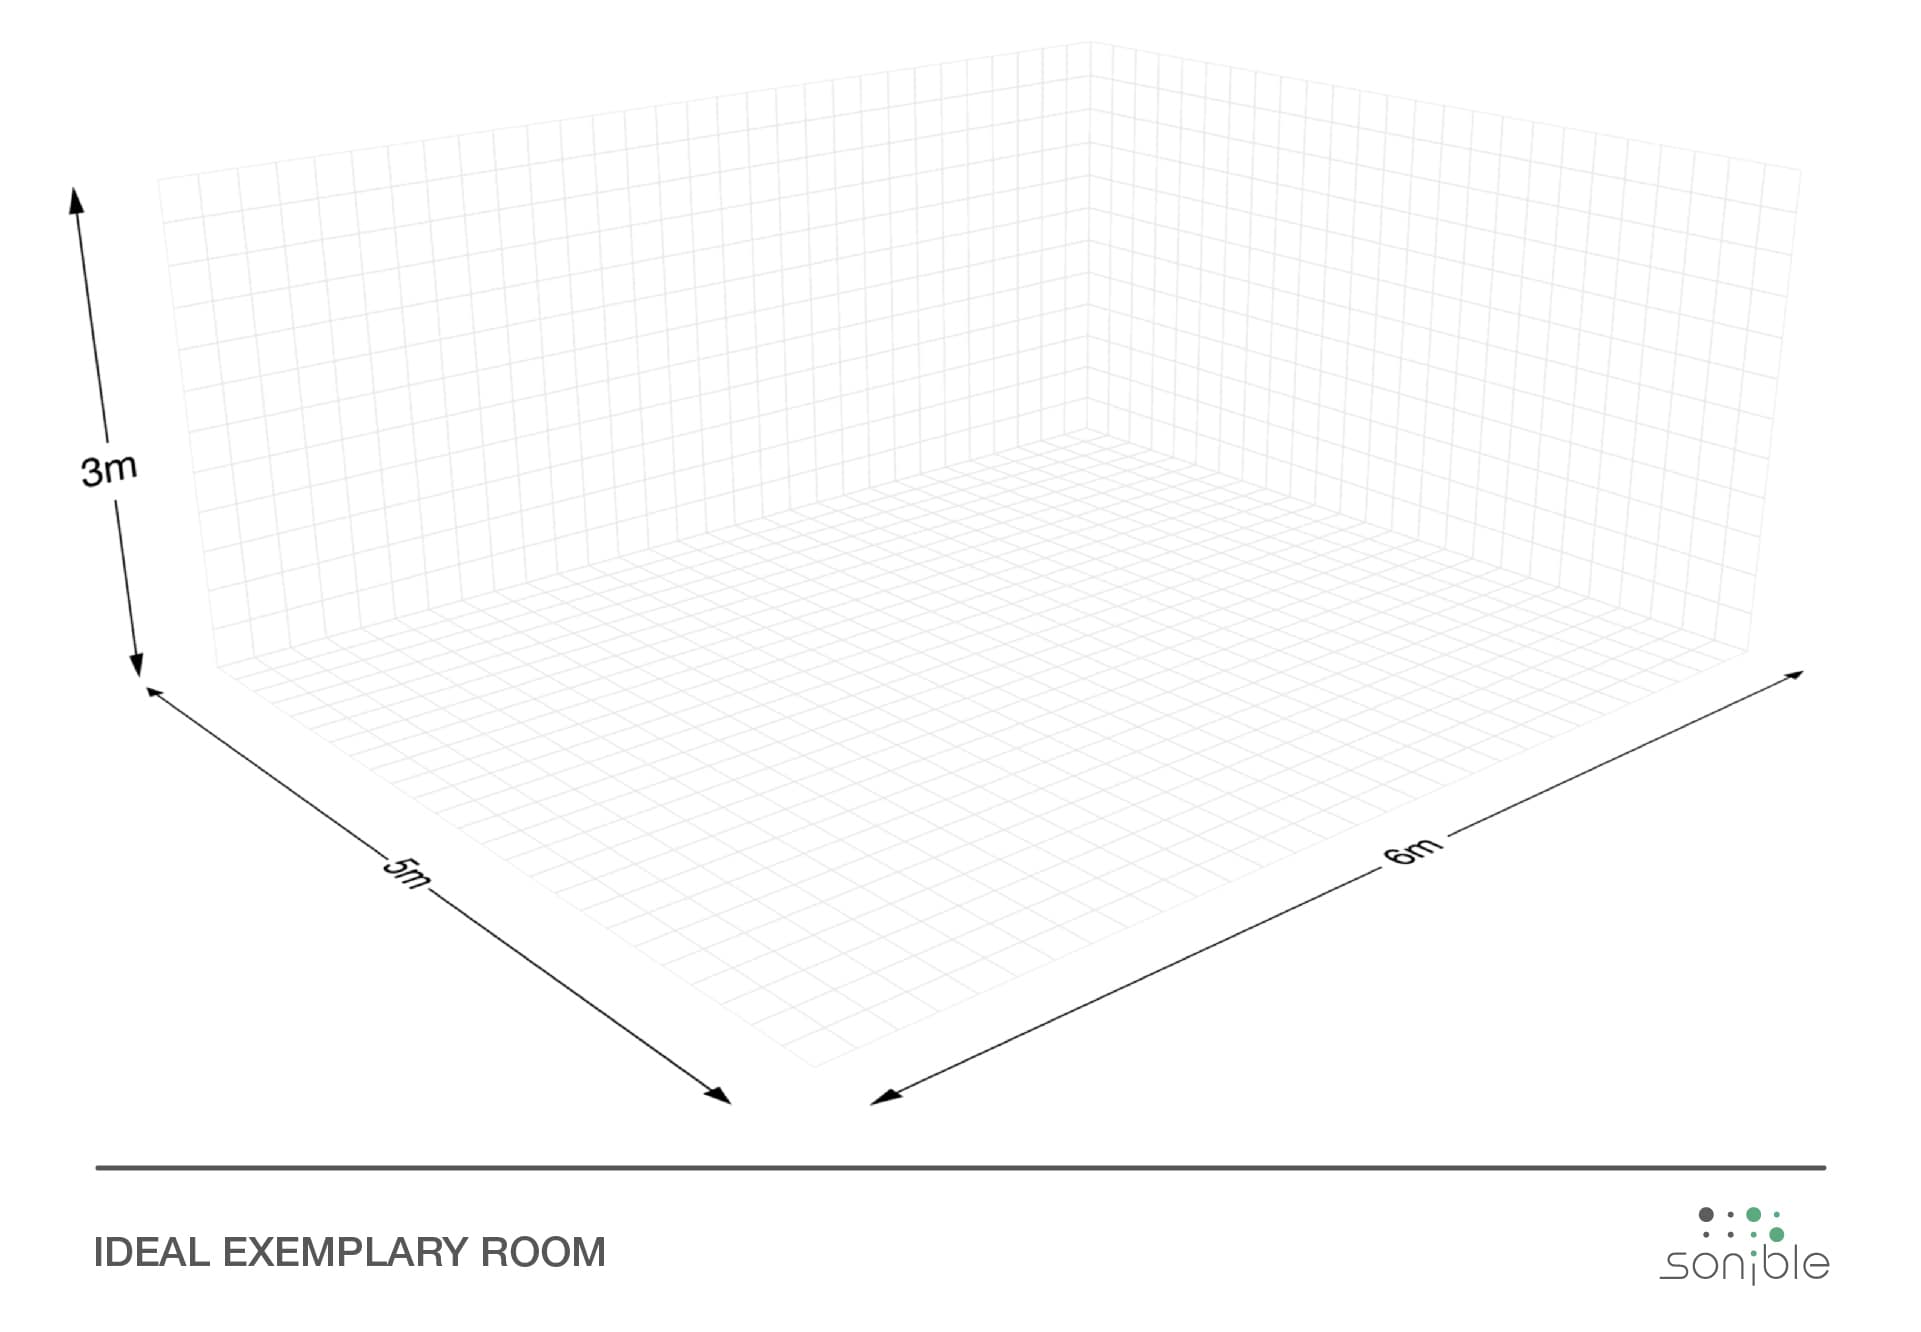
First, we need to create a kind of “acoustic map” of your room. This will indicate where room modes could be problematic. In the second step, we will show you how to apply this map in practice. To demonstrate this, we will use an ideal room of 6 x 5 x 2.5 meters with walls, ceiling and floor parallel to each other as is the norm. All the surfaces are solid. Finally, we will show you how to transpose our calculations onto your actual audio environment.
The effects of room modes are usually most noticeable up to 350 Hz. Accordingly, we will use this frequency as the upper limit for our calculations. The so-called Schroeder Frequency is a way to determine this limit for any room exactly. It is included in our room mode table.
To begin with we create a room mode table that includes the most influential axial modes. These occur between parallel walls. Between parallel surfaces the sound pressure p distribution behaves similar to that of a guitar string (air) which is fixed between two points (walls). In both cases, the distance between the walls (respectively the length of the string) is essential for determining which frequencies are affected. The distribution of the sound velocity (velocity, red) looks exactly the opposite. The hearing is sensitive to sound pressure. Depending on the type, microphones can also be sensitive to sound velocity.
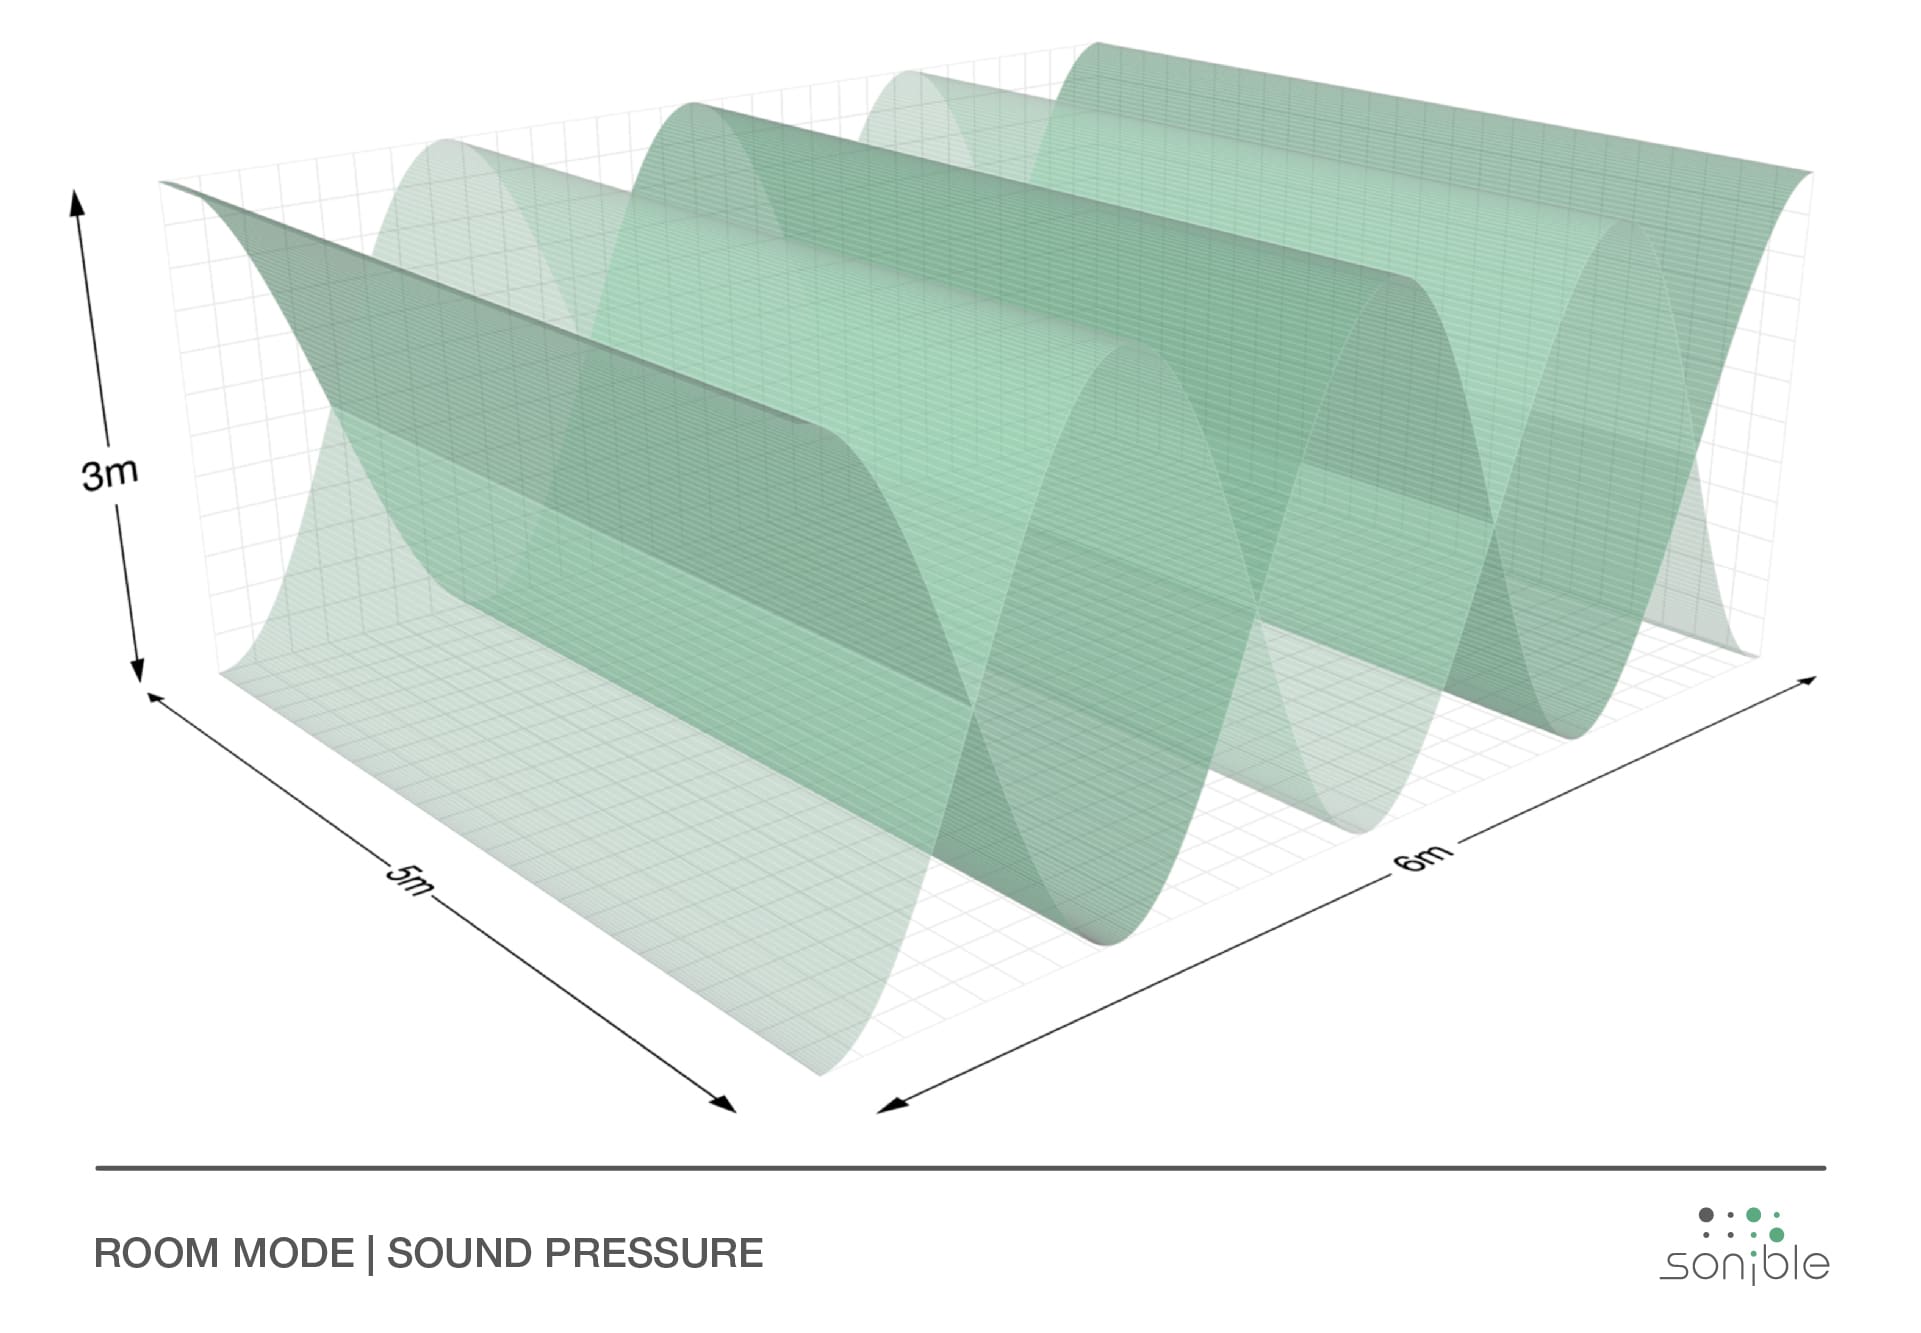
The distribution of the sound pressure of a fourth-order room mode. The pressure maxima are directly at the walls.
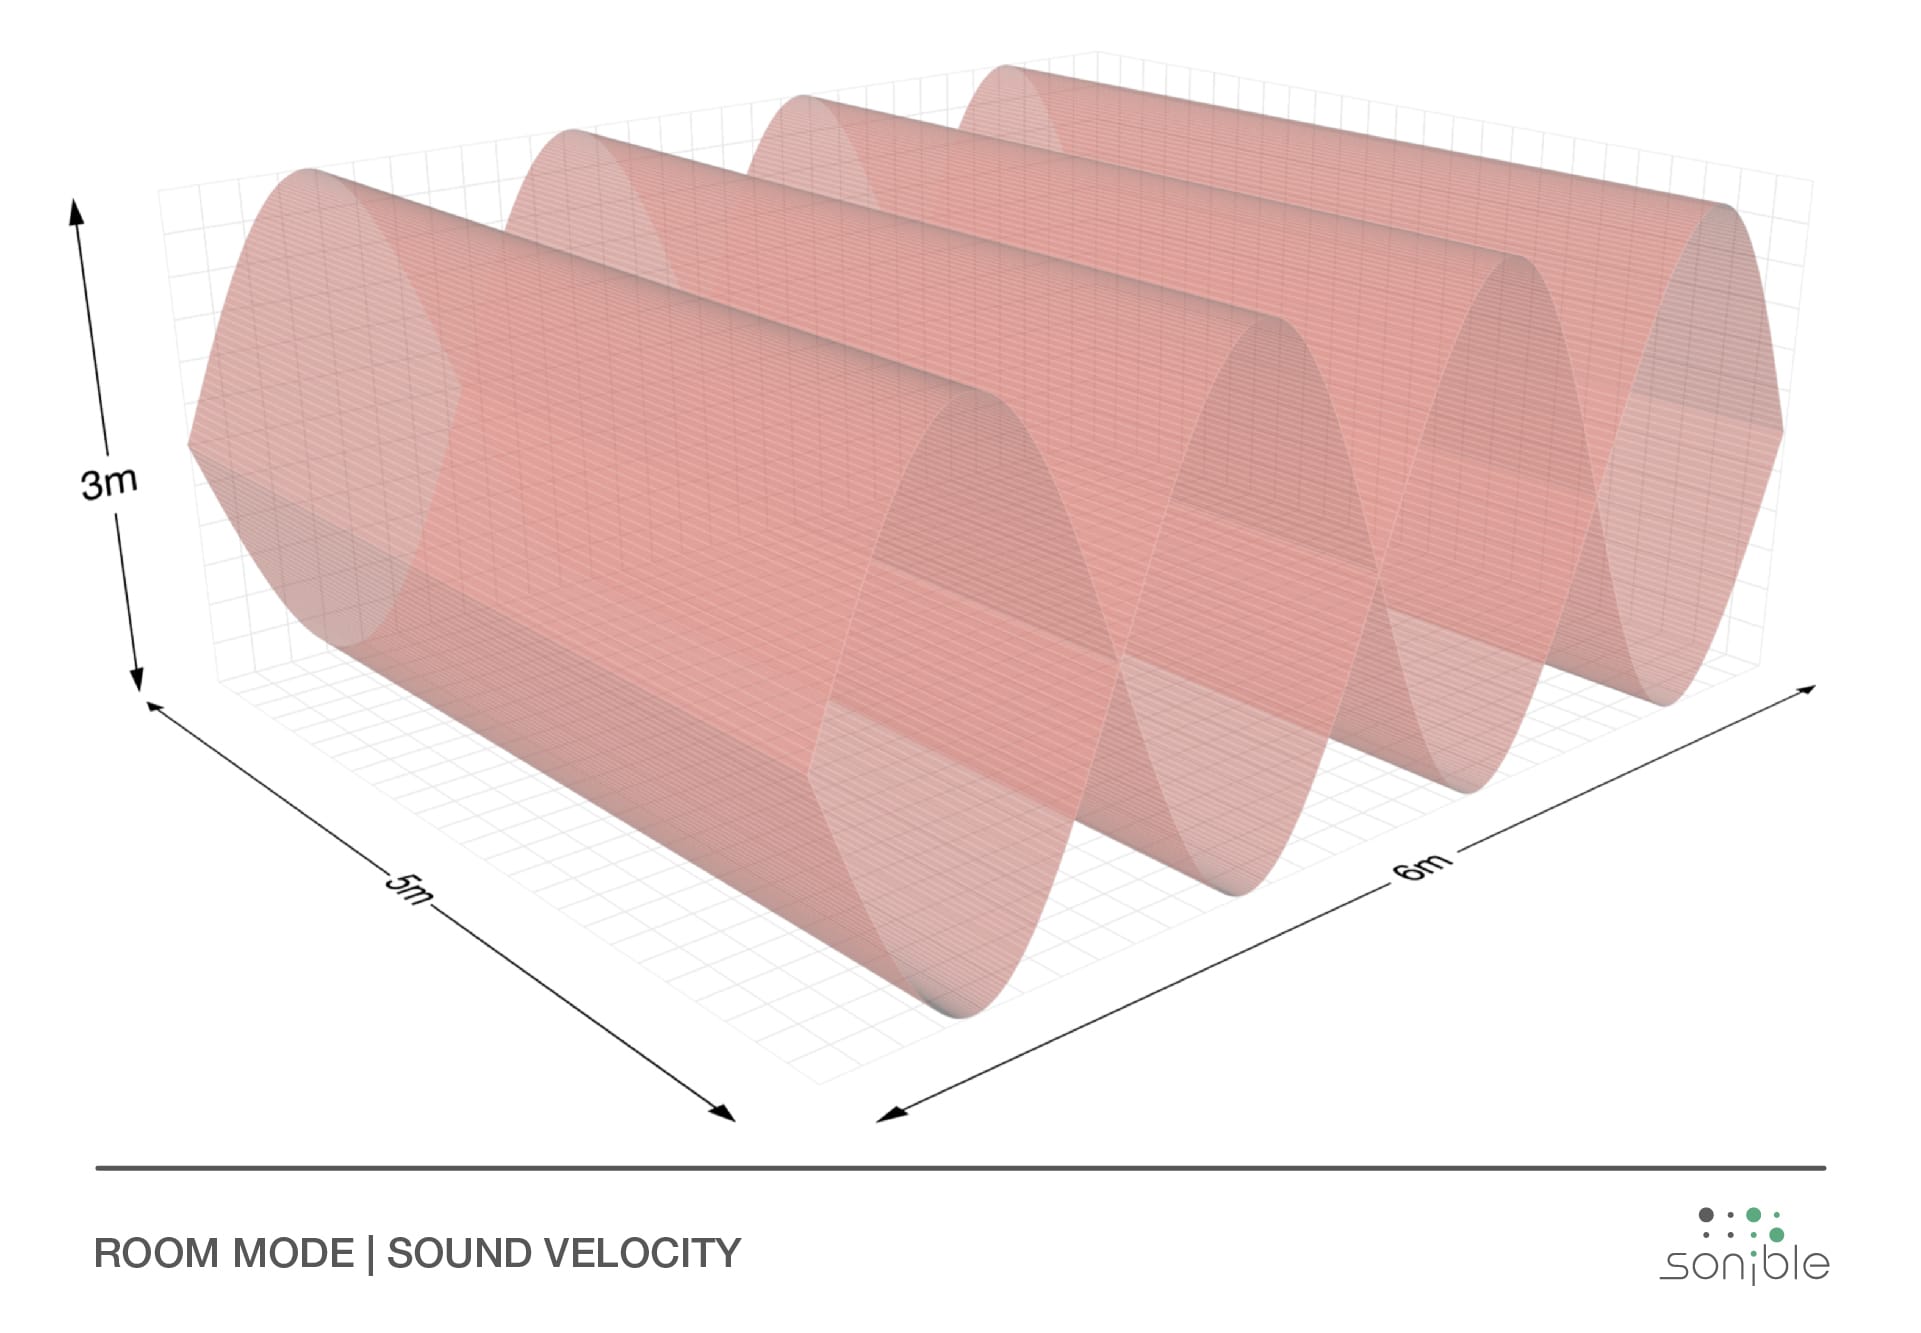 The distribution of the sound velocity of a fourth-order room mode. The velocity minima are directly at the walls.
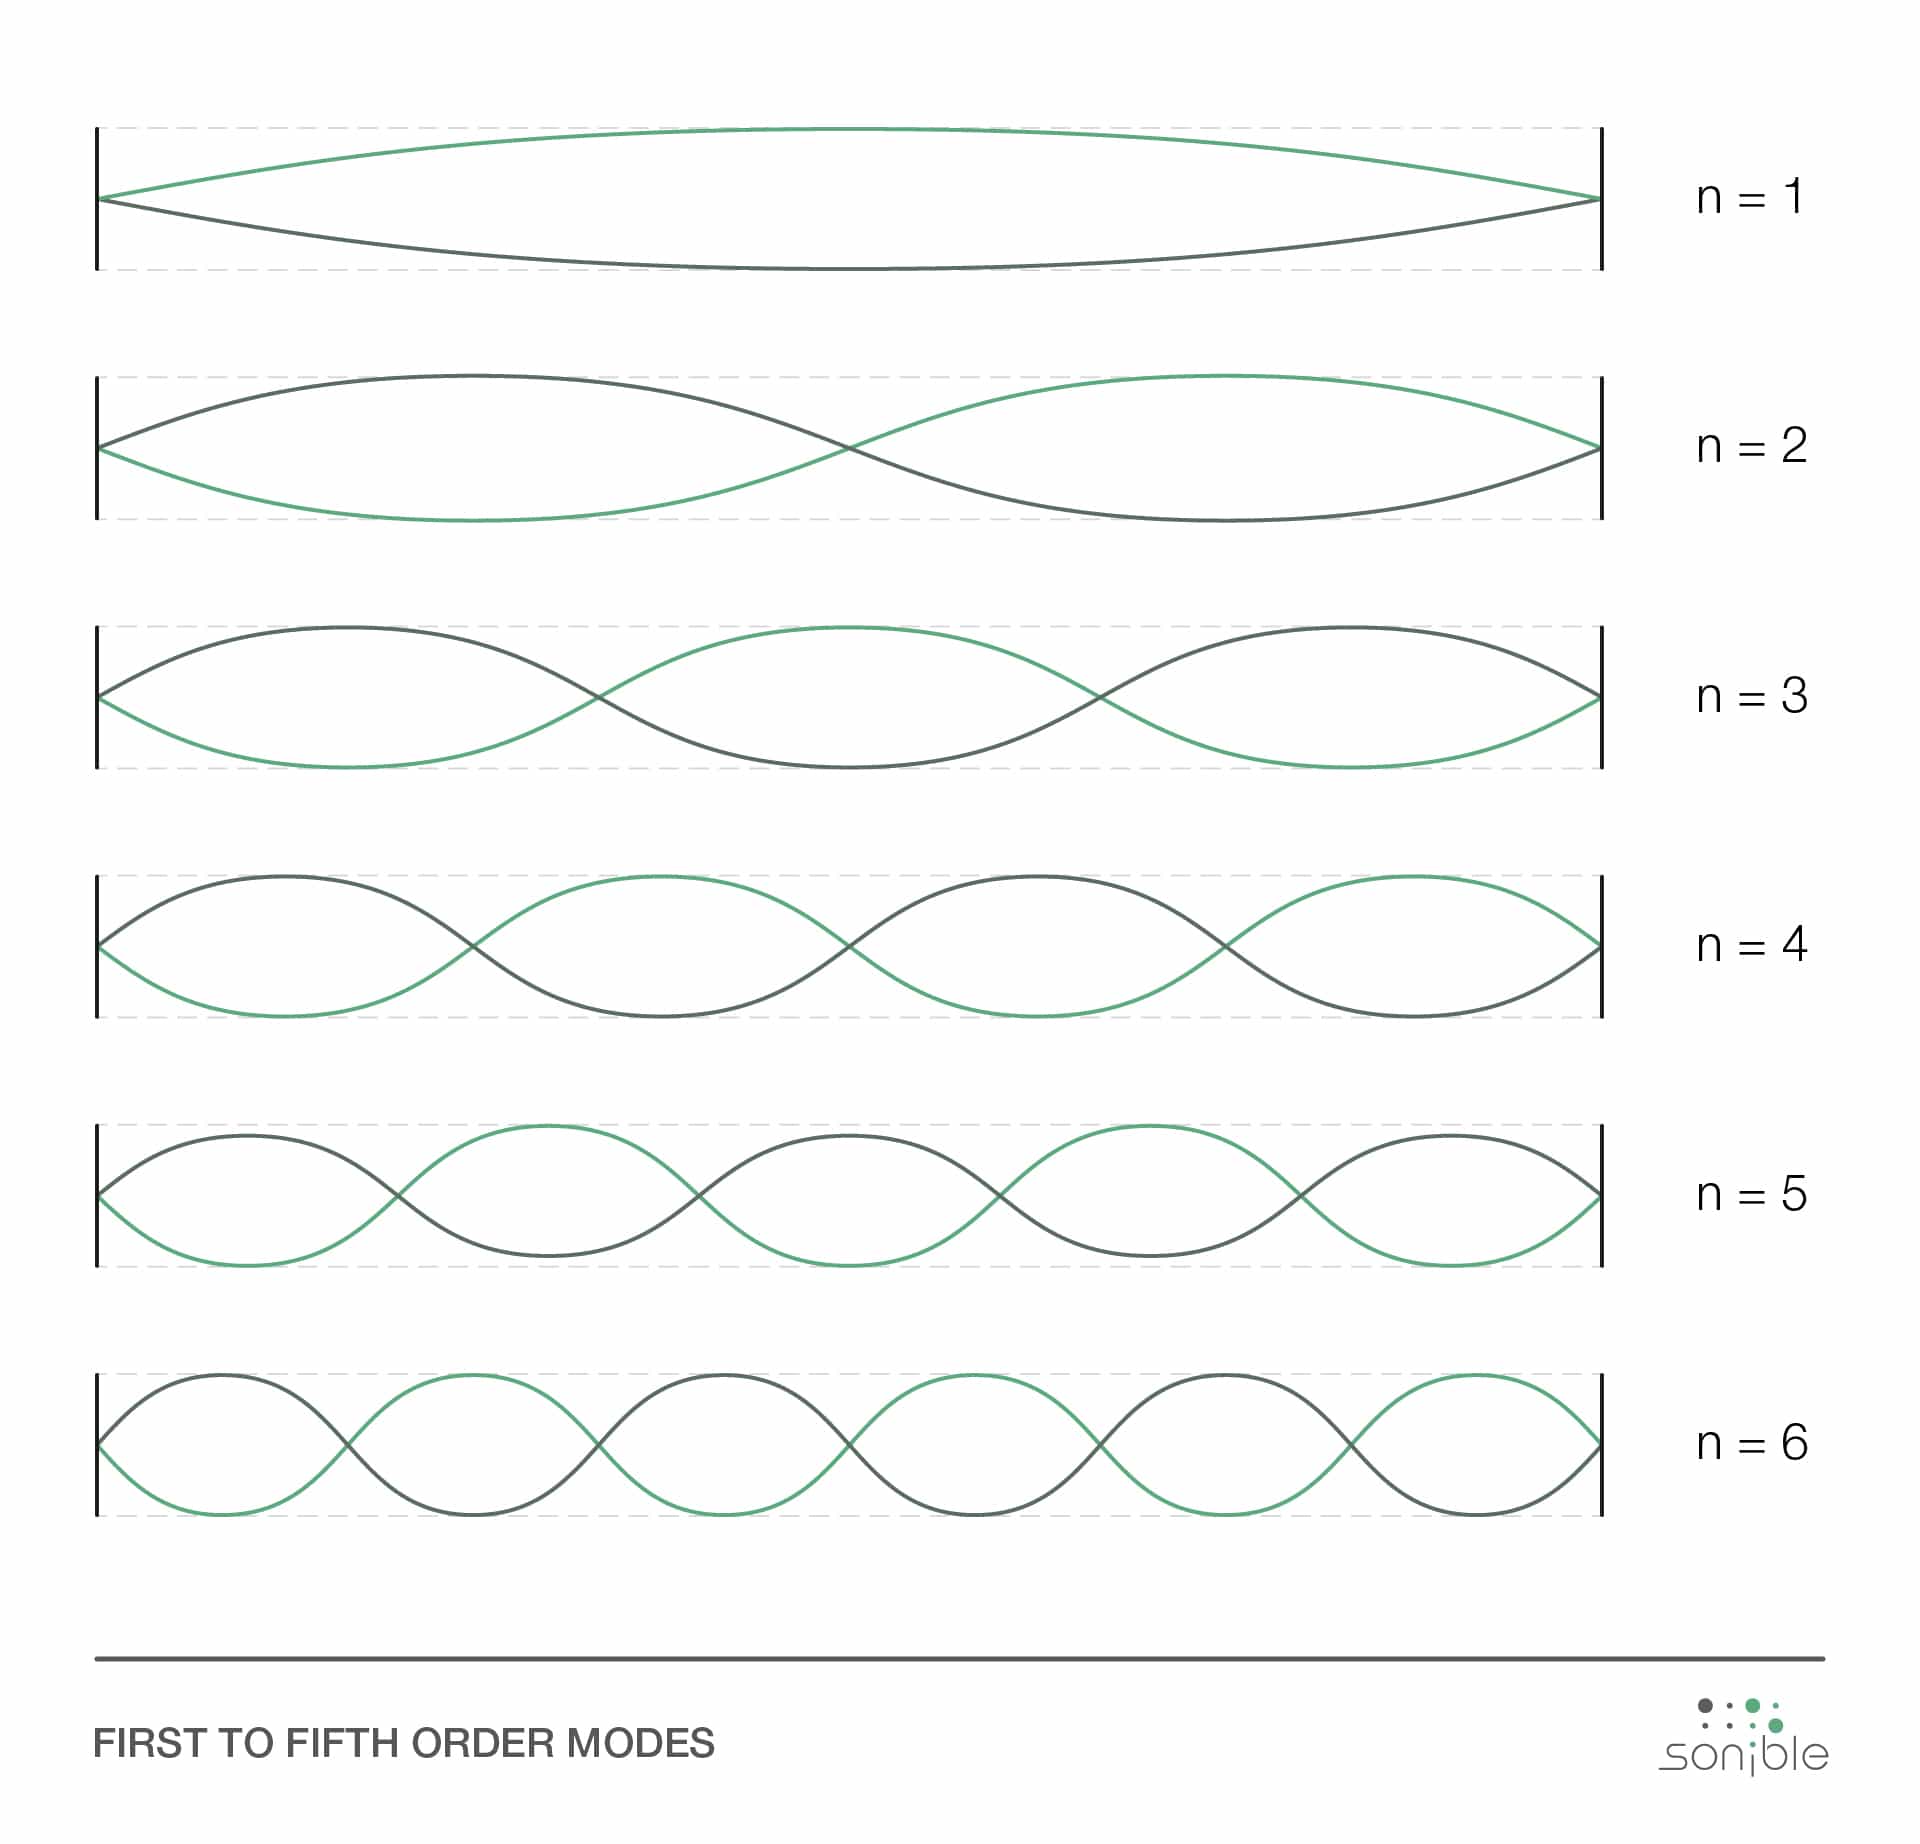
Each mode possesses several orders, i.e. integer multiples of its basic frequency.
Using the formula

we then calculate the frequencies for the lowest order n=1 along the length d=6 of the room. In our example, it looks like this:

For the order n, integers are inserted consecutively. For the formula symbol d we use the respective room dimensions and the speed of sound c is assumed to be 343 meters per second. This is the table:
To quickly create the table you can simply use this free Excel spreadsheet template. Simply enter your room dimensions and it will then calculate the rest including the wavelength in meters:
Free room mode table Excel sheet
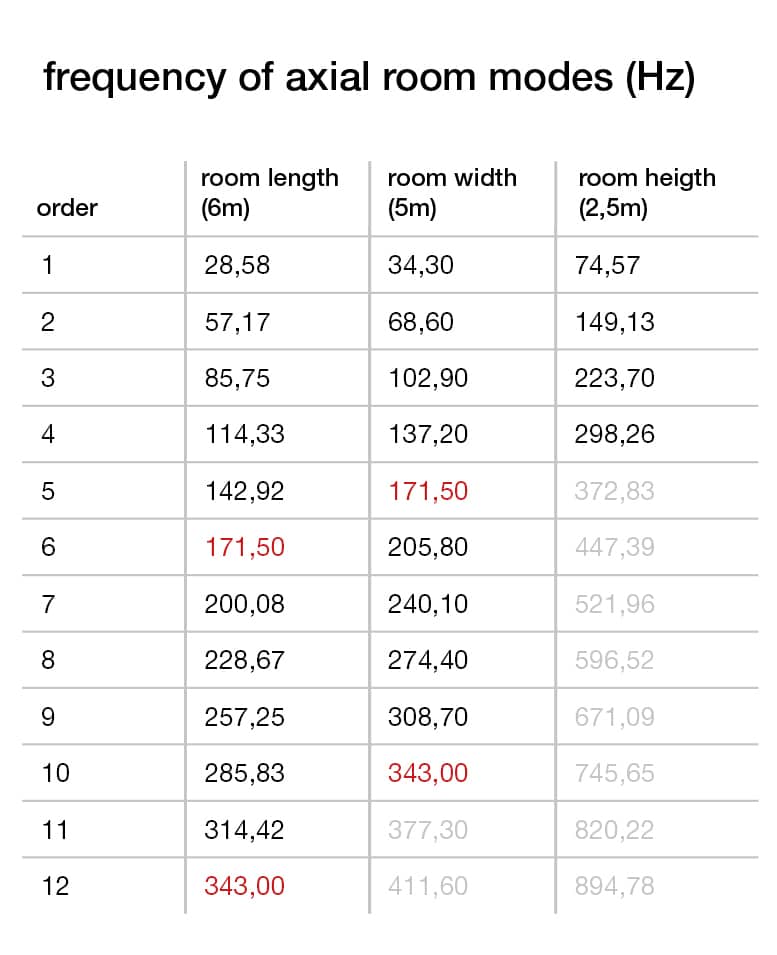
At first glance, some problematic frequencies seem to appear in this table. The frequencies marked in gray are outside the relevant range. It is also possible that certain frequencies occur more than once in your table (marked red). This is the case when at least two room dimensions are in an integer relationship to each other. They then become particularly susceptible to disturbing resonances. Always keep an eye on these. Especially when it comes to your listening position.
The room mode table refers to an ideal room, as mentioned above. In reality, its surfaces, furnishings and architecture give each room additional specific acoustic properties. To refine your acoustic map and find the perfect listening location, you don’t need more than a sine wave generator and your hearing. Here is a step-by-step guide:
PROTIP: Modes also occur between the ceiling and the floor: always pay attention to the correct height of the listening position.
Once you’ve gone through these steps, you get a pretty accurate idea of how low frequencies behave in your room. It will never be perfect, but the right listening area and awareness of the peaks and valleys of the sound waves will improve your mix in any case. For recording, the procedure is similar to the one described above.
The same basic rules apply to recording and microphone placement as for locating an ideal listening position. A major difference between the ear and the microphone is that the ear is sensible to sound pressure whereas microphones can also be sensible to sound velocity (see graphics above). That means that the recording might sound differently that what your hearing perceives at the exact same position. Just by making slight spatial shifts you can already help to solve this. And especially when working in new and unknown locations, trial and error can be your best friend.
Sometimes you have to deal already recorded material. If the tracks have some room resonances on them, you can’t usually get rid of them with a filter afterwards without destroying the sound source itself.
proximity:EQ+ offers a unique solution for disturbing room modes in post production. This plug-in tool processes the room information, i.e. the reverberation separately from the direct signal, allowing you to filter out the distracting room resonances without changing the characteristic sound of the material.
PROTIP: Forget about egg cartons and packaging material made of (cheap) foam! Their positive effect on the room acoustics is minimal and they won’t get rid of room modes at all.
Up until now we have mainly discussed how to handle room modes quickly, easily and inexpensively. For professional work or a commercial (recording) studio, it is advisable to carry out structural room acoustic measures.
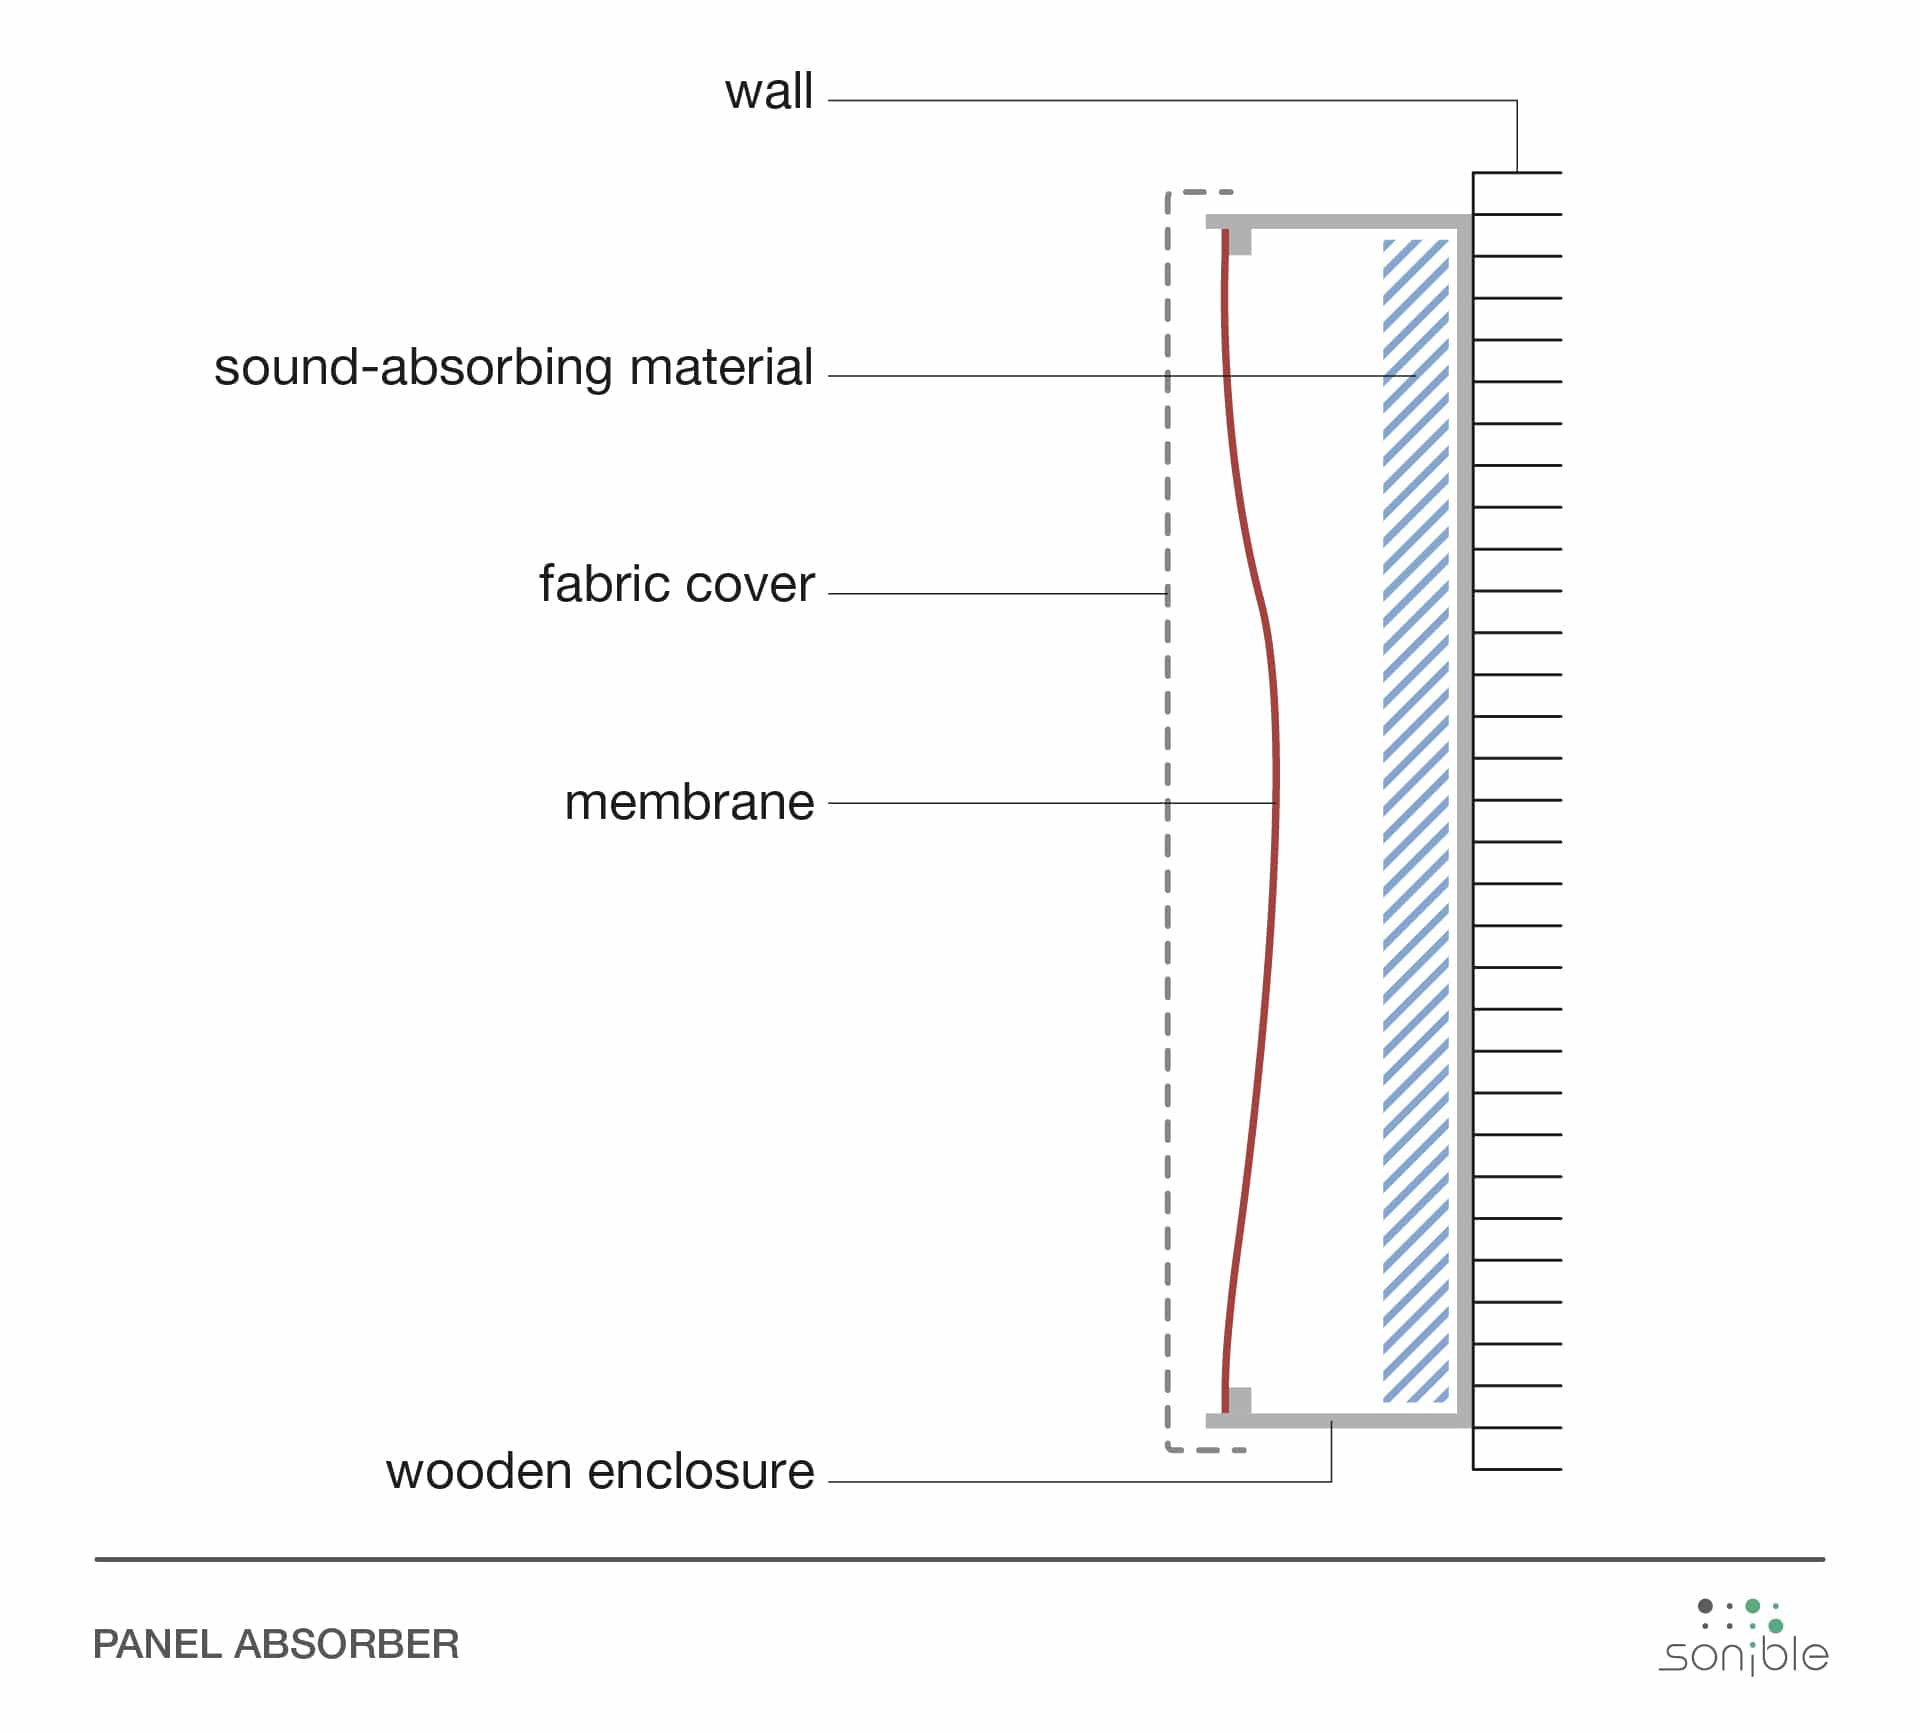
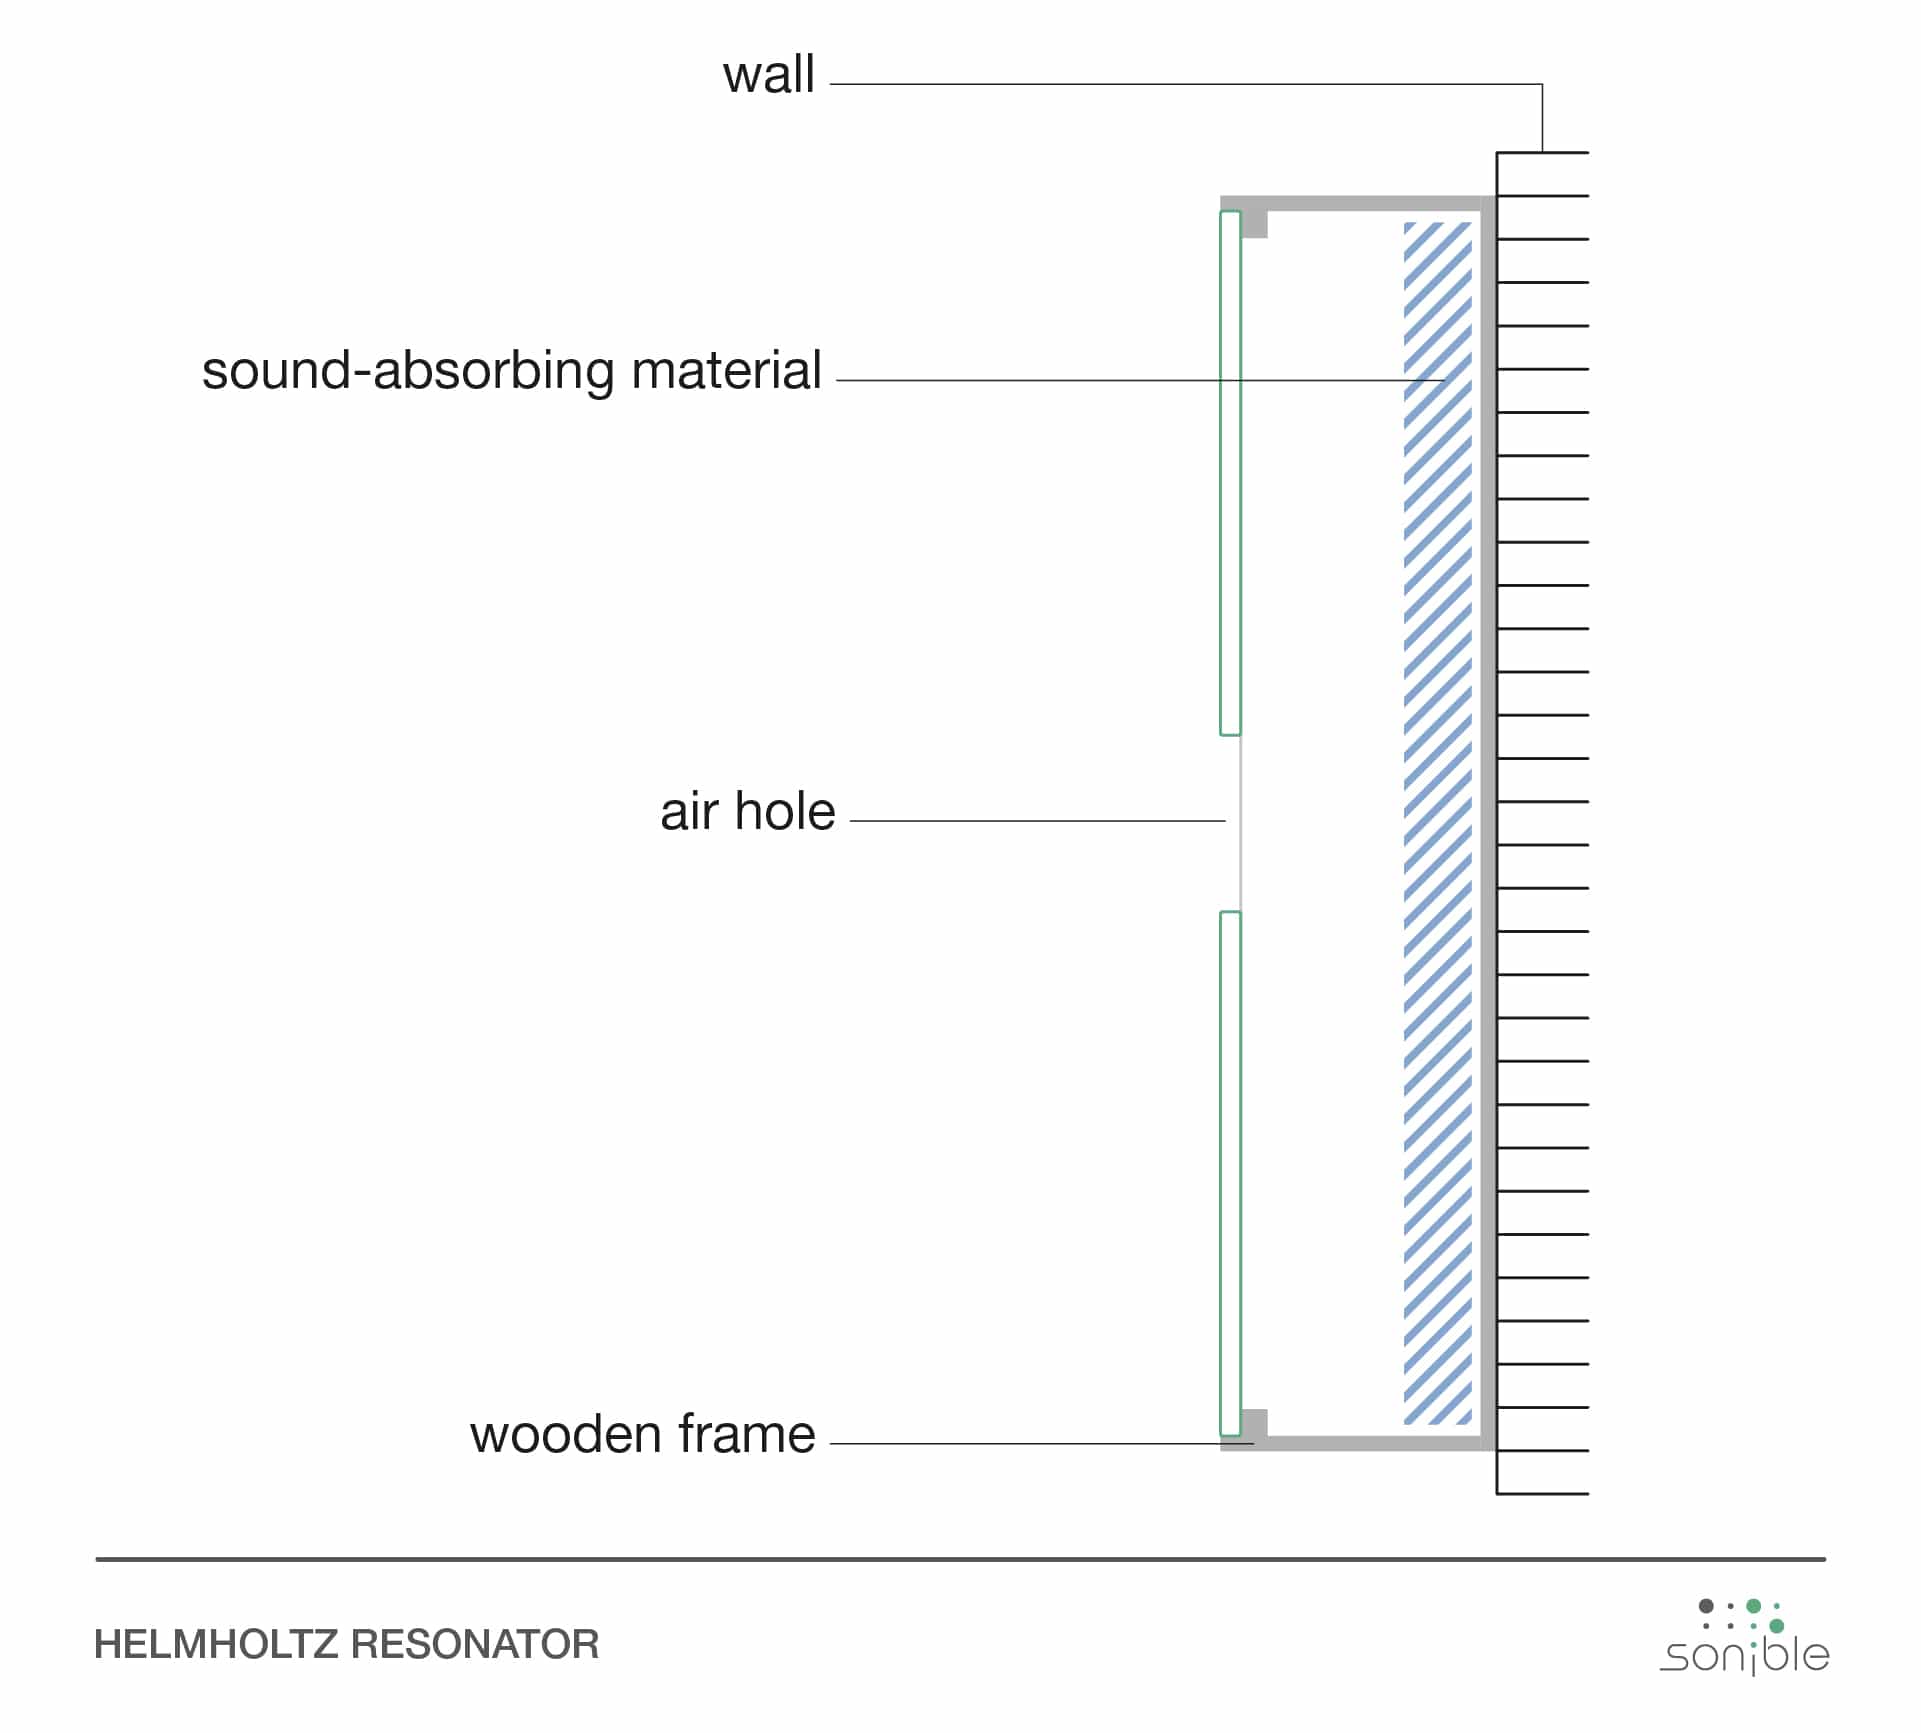
Structural sound insulation for taming room resonances include bass traps, panel absorbers and Helmholtz resonators. Such acoustic insulation makes the sonic image more balanced and considerably reduces room mode-related bass drone. Helmholtz resonators are individually tuned to a room and to precisely defined frequencies. Not every studio has enough space for them though as they need an estimated depth of at least 30 centimeters in order to be effective.
Here are a few words about two kinds of absorber:
Resonance absorbers include panel absorbers and Helmholtz resonators (Wikipedia). In principle, they extract the energy from certain frequencies by decelerating them. They work in a rather narrow frequency range.
Porous absorbers are made of a foam material that is permeable to air – in contrast to conventional packaging material. They are often referred to as bass traps and are designed to be installed in room corners. They come in different sizes and shapes, such as columns or wedges for wall mounting. They have become very popular due to their ease of use.
Be aware though that too many absorbers can make a room sound dull!