The A.I. engine in smart:EQ 2 doesn’t replace a human being, of course. But teaming up with it will enable you to achieve complex and detailed EQing solutions more quickly. Find out how.
Note: We replaced smart:EQ 2 with smart:EQ 4! The intelligent equalizer now sports more AI-powered functions and was overhauled extensively. The following insights regarding the processing and functionality are similar in smart:EQ 2 and it’s successors smart:EQ 3 and smart:EQ 4 though.
A.I. can really help us with technical workflows. It offers a solid starting point and sometimes “sees” details that escape our ears. When we combine the automatic algorithms with our individual experience, we get the best of both worlds. Learn how to use the smart:filter, the heart of smart:EQ 2.
To use the smart:filter, the plug-in has to learn the smart:response by performing the following steps:

A profile primes the learning process of the smart:filter towards particular sound sources. Please note that you can always start with the ”standard” profile (selected per default) and switch to more specific profiles later. Choosing the right profile will typically speed up and enhance the learning process.
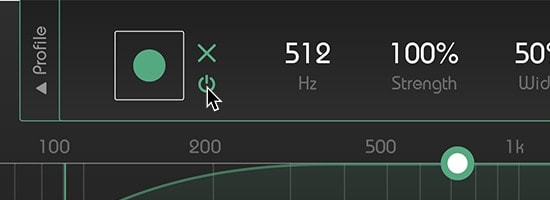
Step 2: Enable the smart:filter
Click the on/off symbol right to the green record button to enable the smart:filter (on startup the filter will be enabled per default).
Step 3: Start the audio playback
The filter needs incoming audio material for the learning process.

Step 4: Start learning
Click the green record button. Now, a pulsating pause icon indicates that the smart:filter is actively learning.
The smart:filter will stop learning as soon as a certain spectral balance has been reached (the pause button stops blinking and turns back to a record icon).
Tip: If you want the smart:filter to continue learning, repeat steps 2 to 4. To restart learning from scratch, click the reset button ”x” and repeat steps 2 to 4.

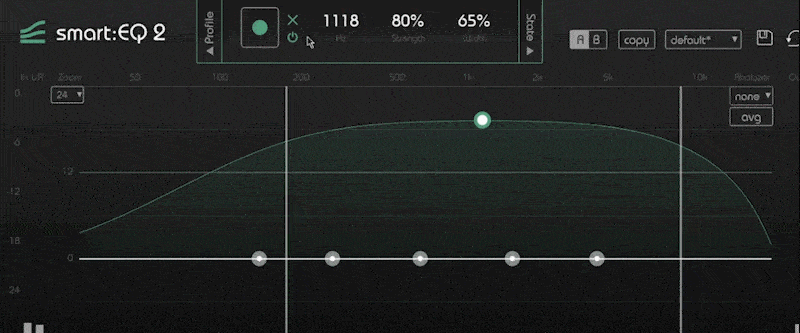
Step 5: Adapt the computed smart:response
You can now control the impact of a computed smart:response: The curve looks similar to a conventional filter, but is in fact the weighting curve for the calculated smart:response. Now that it has been learned, you can interact with the weighting curve as with any normal filter curve.
Remember! The green curve is a weighting curve and NOT an EQ curve. This means that a positive weight may cause a negative gain in certain frequency regions, if the smart:filter computed a negative gain for the corresponding frequencies.
Have a look at the video and learn how to use the smart:filter on a piano line within a synth rock-project.