Complex MADI routing scenarios can be difficult to handle for live engineers. The ml:mio simplifies the connection between different MADI formats and vendors.
The robust ml:mio is developed for maximum flexibility. The rugged MADI format converter is the perfect partner for live engineers. It allows the routing of any input to any output with just the flick of a switch.
The second part of the quick start guide shows how to use the ml:mio in different MADI scenarios:
ml:mio quick start guide | part 2: routing scenarios
Follow the link for part 1: ml:mio quick start guide | part 1: overview
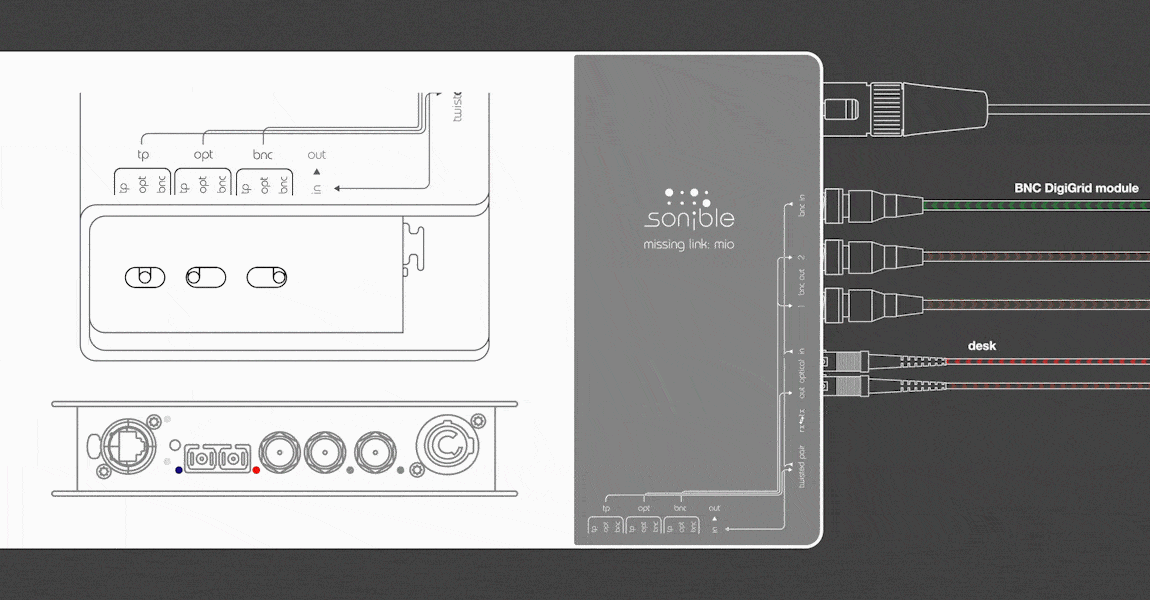
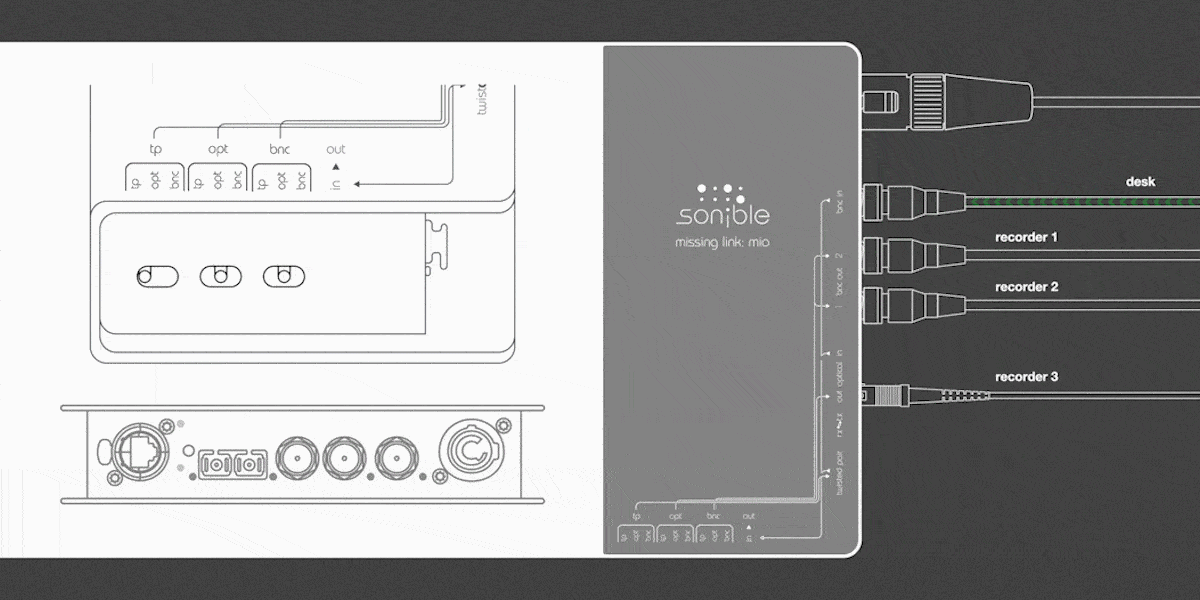
For example, we want to do a live recording via the BNC MADI out of our mixing desk. To eliminate the risk of failure we want to use three individual recorders and split the MADI signal through the ml:mio.
Now we route the BNC input to both BNC outputs and the optical output. The output LED will start to glow green. As soon as the desk sends a MADI signal, the BNC input’s input LED will glow green as well. Now we are all set to start recording on three independent devices.
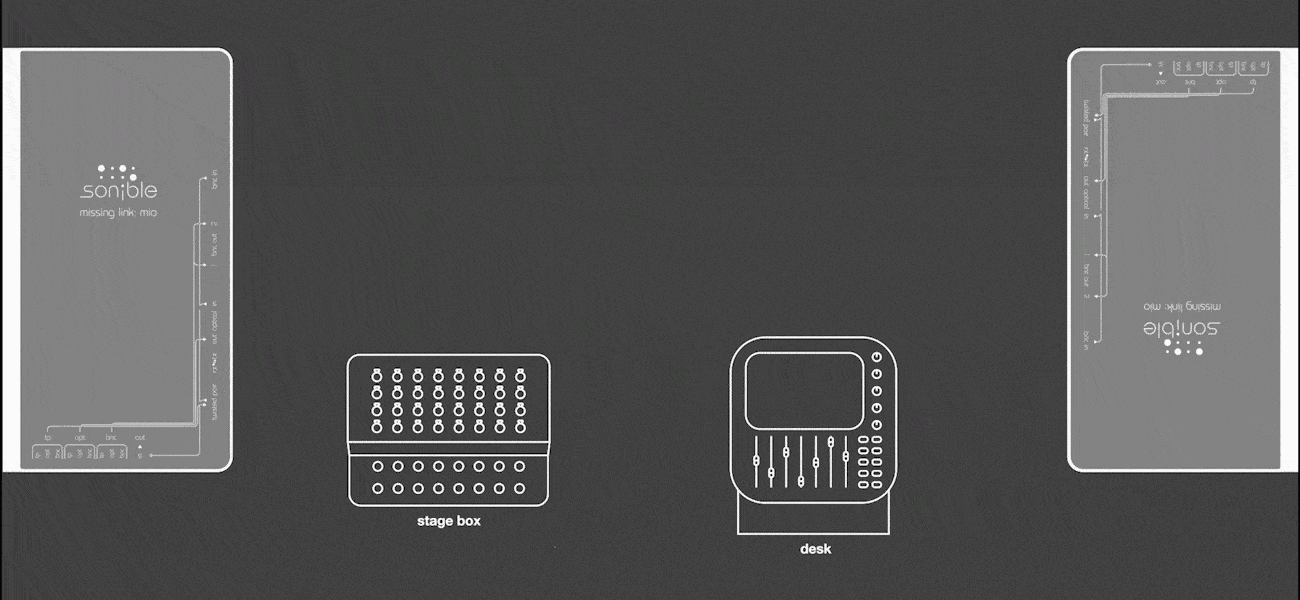
In the second scenario, we want to bypass overcome the TP cable’s distance limitation of TP cables by converting to an optical signal. To do so, we need two ml:mios, both converting between TP and optical.
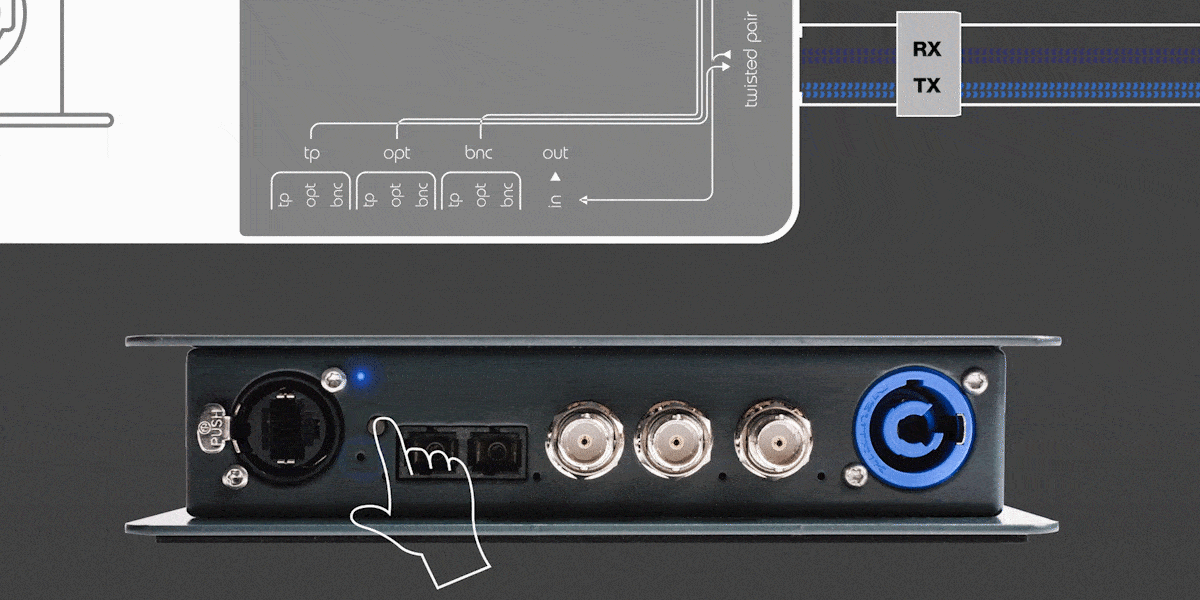
Before we start we have to set the correct vendor mode, because of different pin configurations. A long press (4 – 7 seconds) of the RX/TX-button changes the vendor mode, indicated by a high-frequency blink of the TP-LEDs.
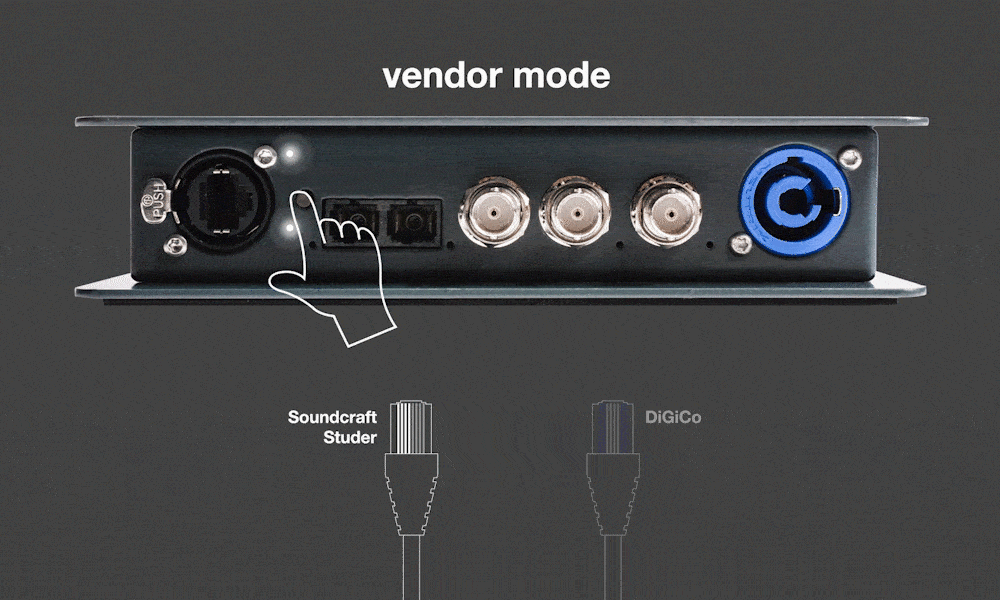
Soundcraft/Studer-mode: white LEDs
DiGiCo-mode: blue LEDs
To change the RX/TX mode, we have to press the RX/TX button shortly (2 – 4 seconds) until the TP-LEDs start flashing in a low frequency. Once the mode is changed, the TP-input-LED will change its position. If it’s located on top, you can connect the ml:mio to a peripheral device, if it’s located on the bottom to a desk. We mirror this RX/TX-setup on the second ml:mio and have made a bi-directional connection between desk and stage box.
In the third scenario, we route the BNC input to the optical output and the optical input to the BNC output, establishing a bi-directional connection between BNC and optical.