We equipped smart:reverb with unique features that approach reverb in a completely new way while offering you the familiar control options. When combining these functions, you can create incredible reverb effects. In this article we show you four examples of “how to going crazy with smart:reverb”.
Note: We replaced smart:reverb with smart:reverb 2! This content-aware reverb plug-in understands single tracks and entire mixes, helping you create exactly the reverb environment you imagine.
We suggest high quality headphones or studio monitors for listening to the following audio examples.
Drum loops tend to sound generic and it’s sometimes hard to integrate them into a mix smoothly. The reason is that today a lot of samples are generated electronically. Hence, they sound static. By using smart:reverb, you’ll be able to give them a unique character though. In this example, we also made sure on different levels that the reverb effect doesn’t end up sounding muddy.
Spread and density explained
With spread you can determine the reverb’s stereo spread over time. This parameter is similar to the global Width parameter, but allows control of the spread’s temporal progression.
Using the density curve allows you to control the reverb’s density evolvement over time. This means that you control how fast the reverb evolves from audible, discrete reflections into a diffuse and dense reverb tail.
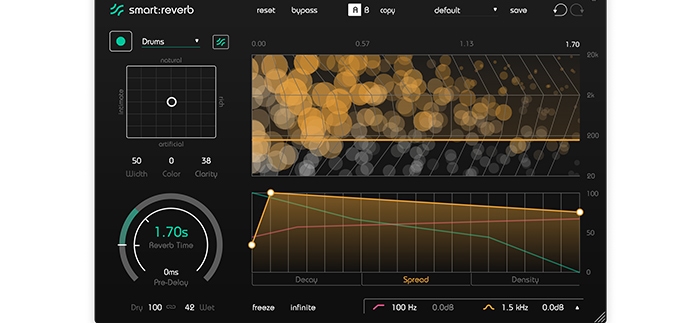
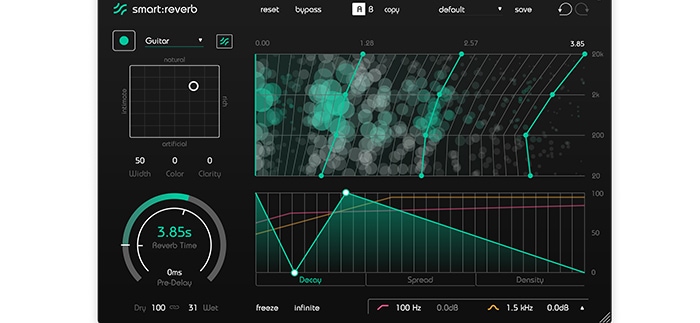
We will go from this …
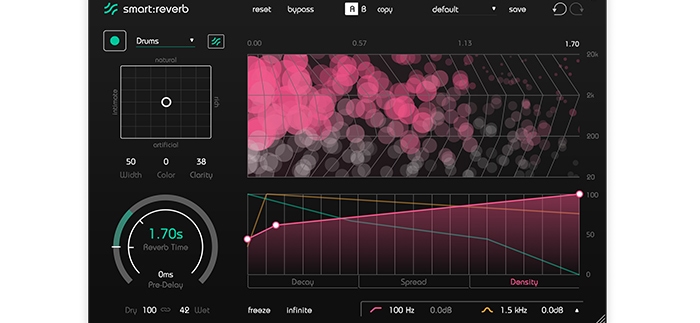
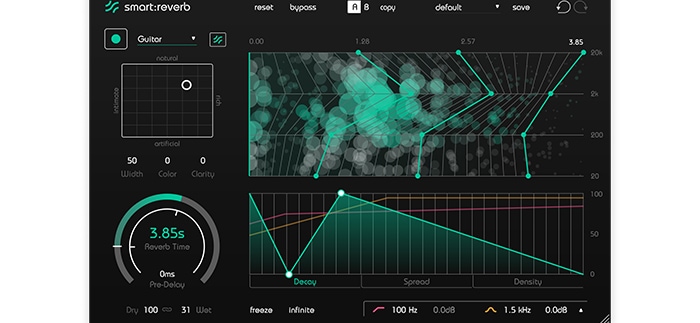
to this …
Step 1:
For this example, smart:reverb was placed on a drum loop. We first activated the learning process with the drum profile. To make the sound generally wider, choose a short reverb time and manipulate the spread curve so that the stereo width of the reverb is very broad at the beginning and decreases only a little afterwards. Additionally, the frequency region affected by the effect was limited in the particle display to stop the spread from going into the deeper frequency regions which can muddy the sound.
Step 2:
We set the density curve in a way that the reverb effect isn’t very dense in the beginning and then gets denser over time. Furthermore, we set a high value for the clarity. Both of these actions help to avoid muddiness.
Step 3:
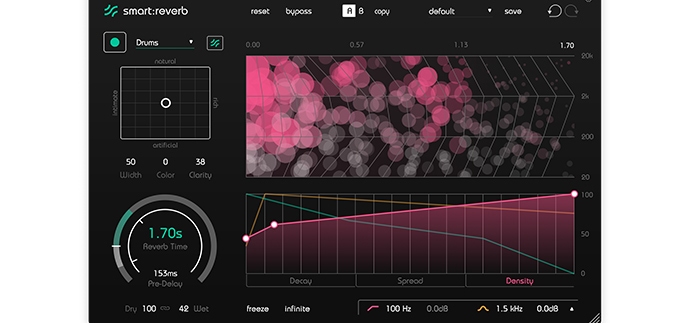
To create a kind of additional rhythm and to intensify the effect of a wide sound, we set a pre-delay – you can choose the value according to your taste and the speed of the track.
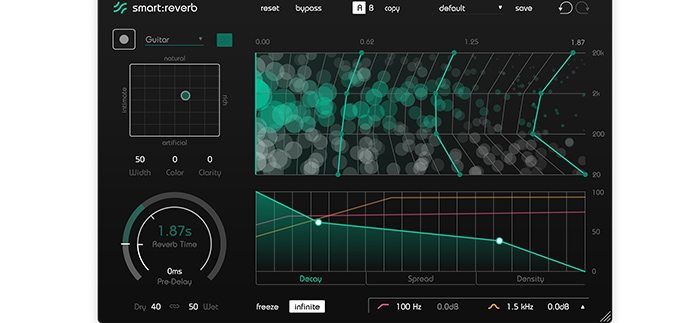
In the temporal shaper of smart:reverb, you are able to precisely set the decay of the reverb. Furthermore, you can control the behavior of the decay with the spectral shaper grid in different frequency regions. With these features you can create extraordinary sounds.
We will go from this …
… to this
Step 1:
First, we chose a suitable profile for the guitar track, let smart:reverb learn and set a long reverb time, to create a balanced sound. By shaping the decay curve so that the energy of the reverb is very high at first, then drops abruptly and rises steeply again just to fade out slowly at the end, the gaps in the track are filled and makes it seem as though the reverb of the guitar has been reversed.
Step 2:
Then we used the spectral shaper grid to further delay the decay in just the high frequency regions. The effect of closing gaps is thus even stronger in the highs.
A lot of producers have a hard time creating a smooth transition between two parts of a track. While it often takes quite some time to establish well-integrated build-ups or fills in a mix, smart:reverb offers a fast option with the Freeze function: You can create a reverb tail with an endless reverb time to produce a smooth transition.
With this source material …
… we create this
Step 1:
In this example we took pads that were then combined with drums. Before adding the effect, the transition sounded flat and took away the dynamics of the track. As a first step, we loaded an instance of smart:reverb onto the pad track and set a long reverb time.
Step 2:
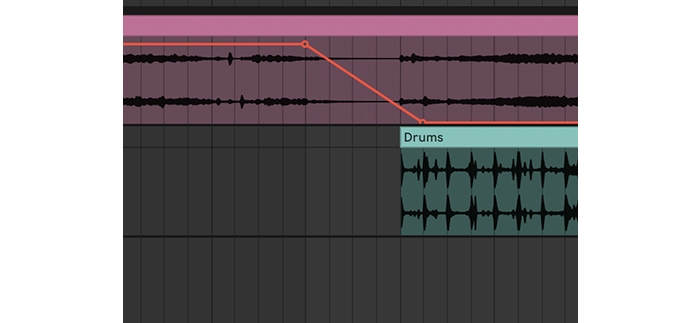
Then we used two automations: To first feed the Freeze function and to activate it and then to create a smooth transition.
Automation 1: This one was set to catch a part of the pads for the activated Freeze function before the break. Depending on your workflow, you can let this one end at the beginning of the next loop.
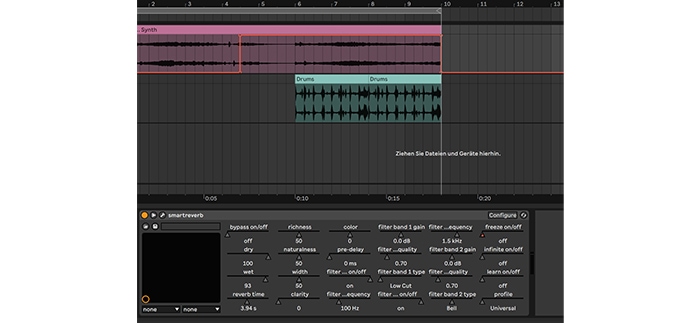
Automation 2: This one determined with which dry/wet ratio the transition will fade out and when the effect will no longer be audible.
When you are working on a mix with a lot of tracks, it often happens that the tracks interfere with each other and the mix ends up being too dense. One way to avoid this, is to place some elements deeper into the sound spectrum. smart:reverb creates atmospheric sounds with its Infinite function. It’s a great option for integrating guitars or pads into a mix.
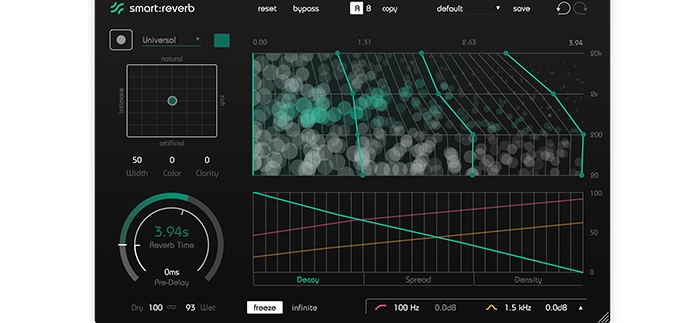
We go from this sound …
… to this sound
Step 1:
In an instance of smart:reverb on the guitar track, we activated the Infinite effect. By turning down the dry signal, we created an even more undefined and atmospheric sound. While the Freeze effect takes the current reverb tail and plays it endlessly, the Infinite effect overrides the current setting of the reverb time and plays all incoming reverb signals infinitely. Due to the atmospheric sound, the guitar now fits much better into the mix of Lo-Fi Beats.